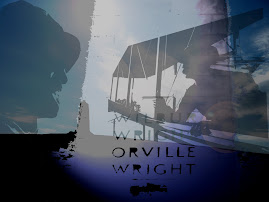
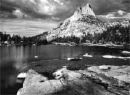
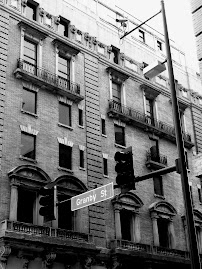
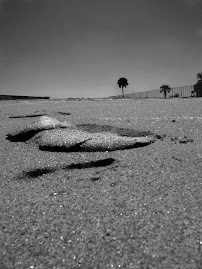
Anyone who is finished with all assignments, try this:
Go to PhotoShop Help>Welcome Screen>Tips and Tricks>Creative Photo Cropping
This is a tutorial on a really neat method of framing your photos!
Turn in for EXTRA CREDIT!!!
Wednesday, January 30, 2008
Tuesday, January 29, 2008
Animal Photography!
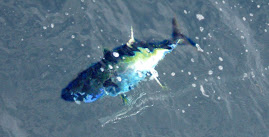
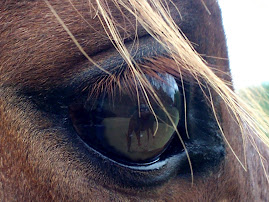
Your assignment for Monday, February 4th, is to photograph animals. It can be your pet, a neighbor's, or wildlife. Check out these links for examples of professional animal shots, and some tips to make your own pictures great:
http://www.desertusa.com/mag99/june/stories/animals.html
http://www.animal-photography.co.uk/
http://www.adobe.com/education/digkids/tips/photo/animals.html
http://www.allposters.com/-st/Animals-Photography-Posters_c58280_.htm
http://www.petsinpastel.com/photo.htm
http://photography.about.com/od/takingpictures/a/petphotography.htm
http://www.cowbelly.com/
http://www.photolinks.com/resources.html?p_page=petphoto.htm
TRY TO MAKE YOUR ANIMAL PHOTOS UNIQUE!!!
http://www.desertusa.com/mag99/june/stories/animals.html
http://www.animal-photography.co.uk/
http://www.adobe.com/education/digkids/tips/photo/animals.html
http://www.allposters.com/-st/Animals-Photography-Posters_c58280_.htm
http://www.petsinpastel.com/photo.htm
http://photography.about.com/od/takingpictures/a/petphotography.htm
http://www.cowbelly.com/
http://www.photolinks.com/resources.html?p_page=petphoto.htm
TRY TO MAKE YOUR ANIMAL PHOTOS UNIQUE!!!

PhotoShop Techniques Test
As you are working in PhotoShop this week, you should be preparing for a test which will be given next week---probably Tuesday. This test will show whether you can do the 'basics' we have learned thus far. You should be able to do the following:
crop for the best shot
rotate a canvas
free transform
straighten a horizon
create a vignette
create a decorative frame
do simple facial retouching
create depth of field/selective focus
warm up or cool down a color cast
clone
merge elements of two photos
use burn, dodge, and saturate
adjust levels and brightness/contrast
use unsharp mask
work with layers
work with filters
change a color photo to black and white
work with opacity
and you should know the basic theories of composition.
If you are having difficulties with any of the above techniques, ask for help!
crop for the best shot
rotate a canvas
free transform
straighten a horizon
create a vignette
create a decorative frame
do simple facial retouching
create depth of field/selective focus
warm up or cool down a color cast
clone
merge elements of two photos
use burn, dodge, and saturate
adjust levels and brightness/contrast
use unsharp mask
work with layers
work with filters
change a color photo to black and white
work with opacity
and you should know the basic theories of composition.
If you are having difficulties with any of the above techniques, ask for help!
Monday, January 28, 2008
Photo Montage
You will have a photo montage due this Friday, Feb. 1st. Please get a printed direction sheet from me. Your montage is different from a collage!
Instructions:
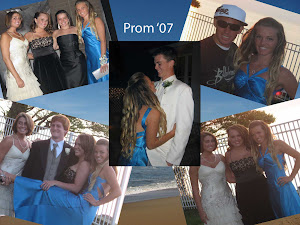
Start a new background 8 inches by 10 inches at 300 PPI. It can be horizontal or vertical. You can use a photo, a pattern, or a color as your background.
Add other pictures as layers. Don’t forget to adjust levels and brightness and contrast on each individual photo. You should follow a theme or have one central idea that connects the photos. The photos do not have to be rectangular. They can be cut-outs, circles, or irregular in shape. However, do not cut objects out of the pictures. A montage differs from a collage in that you are using whole photos, not specific elements from your pictures.
Experiment with the lay-out. You may want some images to overlap each other, and some images to have less than 100% opacity. Experiment with different layer styles (Layer>>Layer Styles) or click on the little cursive 'f' icon in the layers box. You should use a similar treatment with each photo to give the piece unity.
Add text and experiment with both style and fonts. You should also incorporate your name into the piece. Points will be taken off if your name is added later.
When you are satisfied with your project, flatten the image and print it. You should also leave it electronically in the completed assignments folder, using your class identification number.
Instructions:
Start a new background 8 inches by 10 inches at 300 PPI. It can be horizontal or vertical. You can use a photo, a pattern, or a color as your background.
Add other pictures as layers. Don’t forget to adjust levels and brightness and contrast on each individual photo. You should follow a theme or have one central idea that connects the photos. The photos do not have to be rectangular. They can be cut-outs, circles, or irregular in shape. However, do not cut objects out of the pictures. A montage differs from a collage in that you are using whole photos, not specific elements from your pictures.
Experiment with the lay-out. You may want some images to overlap each other, and some images to have less than 100% opacity. Experiment with different layer styles (Layer>>Layer Styles) or click on the little cursive 'f' icon in the layers box. You should use a similar treatment with each photo to give the piece unity.
Add text and experiment with both style and fonts. You should also incorporate your name into the piece. Points will be taken off if your name is added later.
When you are satisfied with your project, flatten the image and print it. You should also leave it electronically in the completed assignments folder, using your class identification number.
Wednesday, January 23, 2008
next project...
Metaphor Self-Portrait
Metaphor--
1) A figure of speech in which a word or phrase that ordinarily designates one thing is used to designate another, thus making an implicit comparison, as in “a sea of troubles” or “All the world’s a stage” (Shakespeare).
2) One thing conceived as representing another; a symbol: “Hollywood has always been an irresistible, prefabricated metaphor for the crass, the materialistic, the shallow, and the craven” (Neal Gabler).
Still Life--Still life is the photography of small groups of objects, either found or put together for the purpose. It may simply be concerned with formal qualities (tones, textures, colours, shapes, form etc) or have a more metaphorical intent.
Check out these sites:http://www.shutterpoint.com/Photos-BrowseCat.cfm?cat_id=7
http://www.shutterbug.net/refreshercourse/lens_tips/1205back/
http://www.betterphoto.com/gallery/dynoGall2.asp?catID=17
Most of what you see here is considered ‘Still Life’ photography.
METAPHOR SELF-PORTRAIT PROJECT:
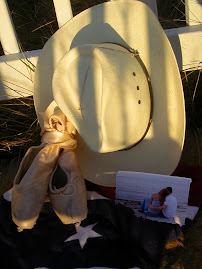
Read these instructions carefully. This photograph is about you. It is a portrait of you. The only thing different is that you are not in it. This picture is a still life, a metaphor that contains at least five things that represent who you are. Your friends should be able to look at it and recognize you in the picture. This picture should not contain any living things, only still objects. It should represent things you are passionate about. Pay special attention to lighting and arrangement of the items. Change them up and see what works best.
You will make a contact sheet with 12 DIFFERENT photos that represent YOU. Your Contact Sheet is due January 28th. Final is due January 30th at the end of class. Additionally, please write a one-page paper telling about the objects in your photo, and why this photo represents you.
Metaphor--
1) A figure of speech in which a word or phrase that ordinarily designates one thing is used to designate another, thus making an implicit comparison, as in “a sea of troubles” or “All the world’s a stage” (Shakespeare).
2) One thing conceived as representing another; a symbol: “Hollywood has always been an irresistible, prefabricated metaphor for the crass, the materialistic, the shallow, and the craven” (Neal Gabler).
Still Life--Still life is the photography of small groups of objects, either found or put together for the purpose. It may simply be concerned with formal qualities (tones, textures, colours, shapes, form etc) or have a more metaphorical intent.
Check out these sites:http://www.shutterpoint.com/Photos-BrowseCat.cfm?cat_id=7
http://www.shutterbug.net/refreshercourse/lens_tips/1205back/
http://www.betterphoto.com/gallery/dynoGall2.asp?catID=17
Most of what you see here is considered ‘Still Life’ photography.
METAPHOR SELF-PORTRAIT PROJECT:
Read these instructions carefully. This photograph is about you. It is a portrait of you. The only thing different is that you are not in it. This picture is a still life, a metaphor that contains at least five things that represent who you are. Your friends should be able to look at it and recognize you in the picture. This picture should not contain any living things, only still objects. It should represent things you are passionate about. Pay special attention to lighting and arrangement of the items. Change them up and see what works best.
You will make a contact sheet with 12 DIFFERENT photos that represent YOU. Your Contact Sheet is due January 28th. Final is due January 30th at the end of class. Additionally, please write a one-page paper telling about the objects in your photo, and why this photo represents you.
Food/Beverage Still Life
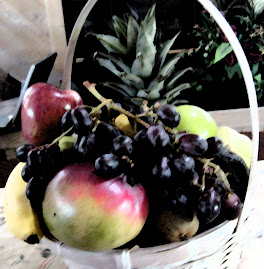
Your Food Still Life will be a 12-6-1 assignment, with one exception. You are to use a creative frame on the final photo as well as a creative filter. I want you to EXPERIMENT with several ways to frame your photo and several filters. Consult PhotoShop 'Help' for tips and techniques and tutorials. Also, play around with the 'styles' button in your layers window (it looks like a cursive 'f'). Each of your six edited photos should show me different techniques and filters you tried before settling on your best final photo.
Here are a few sites that might help with creative framing:
http://photoshopium.com/photo-effects/27/easy-way-to-make-photo-frames-in-photoshop
http://www.shutterfreaks.com/Actions/ACsAdvancedFrames.html
http://graphicssoft.about.com/od/photoshoptutorialsedgefx/Borders_Frames_and_Edge_Effects.htm
Here are a few sites that might help with creative framing:
http://photoshopium.com/photo-effects/27/easy-way-to-make-photo-frames-in-photoshop
http://www.shutterfreaks.com/Actions/ACsAdvancedFrames.html
http://graphicssoft.about.com/od/photoshoptutorialsedgefx/Borders_Frames_and_Edge_Effects.htm
Tuesday, January 15, 2008
Food/Beverage Still Life
Your next project is your choice of food or beverage in a still life set up. As always, take 35-40 shots using different points of view, arrangement, lighting, camera settings, etc. Contact sheet of 12 will be due on Jan. 23rd.
Wednesday, January 9, 2008
NHIs
I wanted to give you an opportunity to take care of any missing projects before report cards go out. Please keep in mind that I show NHI until ALL pieces of the project have been submitted. As of January 9th, I am showing the following NHIs:
Backlit (same close-up backlit shot with and without flash, side by side & contact sheet/12)--11,13,16,112,113,43,53,54,56,57,59,510,512
Before and After Portrait Retouch (contact sheet/12, 4 before shots side by side with the same 4 portraits after retouch):112,43,54,55,57,58,59,510,512
Macro (contact sheet/12, 6 edited, best final photo):112,114,43,51,512
Classwork Collage (collage combining several images--any subject):16,43,510
Family/Relationship Themed Collage (contact sheet/12, collage containing elements from at least four photos): 11,13,16,112,43,57,510
Theories of Composition Photo Shoot (classwork grade--contact sheet/12, 6 on Word doc. w/paragraph):16,43,55,56,57,510,512
Landscape (contact sheet/12, 6 edited, best one): 112, 55,57,510
People Collage (collage combining at least five portraits): 116,43,54,59
Catalog page (one photo demonstrating colorizing an article of clothing, with text): 43,58,510,512
Practice Hockney collage (contact sheet/24 b&w photos arranged on white printer paper: 43,510,512
Composition Research Paper: 55, 510
In an effort to raise the grades of some of you who have become very far behind, I will still accept any of the above NHIs until 5:00 p.m., Monday, January 14th. Your grade will, of course, reflect how late the project may be. Remember, projects make up 60% of your grade, and ANY NHIs hurt your grade badly in this class.
I have not yet graded Hockney (paper collage) or the Backlit Landscape (12/6/1), but you know whether or not you've turned those in. They will also be included on this report card.
Backlit (same close-up backlit shot with and without flash, side by side & contact sheet/12)--11,13,16,112,113,43,53,54,56,57,59,510,512
Before and After Portrait Retouch (contact sheet/12, 4 before shots side by side with the same 4 portraits after retouch):112,43,54,55,57,58,59,510,512
Macro (contact sheet/12, 6 edited, best final photo):112,114,43,51,512
Classwork Collage (collage combining several images--any subject):16,43,510
Family/Relationship Themed Collage (contact sheet/12, collage containing elements from at least four photos): 11,13,16,112,43,57,510
Theories of Composition Photo Shoot (classwork grade--contact sheet/12, 6 on Word doc. w/paragraph):16,43,55,56,57,510,512
Landscape (contact sheet/12, 6 edited, best one): 112, 55,57,510
People Collage (collage combining at least five portraits): 116,43,54,59
Catalog page (one photo demonstrating colorizing an article of clothing, with text): 43,58,510,512
Practice Hockney collage (contact sheet/24 b&w photos arranged on white printer paper: 43,510,512
Composition Research Paper: 55, 510
In an effort to raise the grades of some of you who have become very far behind, I will still accept any of the above NHIs until 5:00 p.m., Monday, January 14th. Your grade will, of course, reflect how late the project may be. Remember, projects make up 60% of your grade, and ANY NHIs hurt your grade badly in this class.
I have not yet graded Hockney (paper collage) or the Backlit Landscape (12/6/1), but you know whether or not you've turned those in. They will also be included on this report card.
Still Life Photography
Check out the following sites:
http://webhome.idirect.com/~dpl/gallery1.html
http://www.betterphoto.com/gallery/dynoGall2.asp?cat=17
http://www.usefilm.com/photo_category/16/Pictures_of_Still_Life.html
http://www.apogeephoto.com/mag2-6/mag2-7winners.shtml
http://www.stilllifewith.com/2006/07/14/photo-contest-from-food-wine-magazine/
http://stilllifewith.com/2006/12/01/stw-challenge-for-december-tradition/
http://digitalmedia.oreilly.com/2004/09/15/food_photos.htmlhttp://www.markhemmings.com/MarkWebsite/food_photography/index.htm
http://dessertfirst.typepad.com/dessert_first/2006/05/food_photograph.html
Basic Principles of Still Life Photography:
Throughout the decades, artists have depicted still life scenes—arrangements of inanimate objects—in paintings and photography. Shooting still life subjects is one of the best ways to sharpen your photographic skills. You can take your time, and your subject remains stationary.
Good composition, framing and lighting are all very important to translate your still life into a great photo. Every day we are bombarded with still life images of appetizing foods, shiny housewares and other appealing products in magazine ads, brochures and catalogs. Professionals spend a great deal of time setting up these shots and you can learn a lot just by studying the photos you find most appealing and unique.
Notice how photographers use repeating shapes and lines to create patterns and use complimentary colors. Study the lighting that they use. Simplicity is very important when composing still lifes. You don’t need to collect a wide range of complicated objects to create an interesting picture. Instead, choose a few objects with a common thread.
The arrangement of a still life should begin with the positioning of a single dominant subject. Then add other objects one at a time, and examine the arrangement through your camera’s viewfinder. Experiment with your camera angle until the scene shows the elements in the most pleasing balance. Photograph the original grouping, and then rearrange or remove objects to see if it improves the composition.
Your next project will involve setting up a still life of specific objects and photographing it. To help prepare you, read the previously mentioned articles and find 6 still life photographs from the Internet that you particularly like. These photos should include only inanimate objects. Paste the 6 photos to a one-page word document (two columns) and write a short paragraph about each. Tell what techniques the photographer used that appeal to you. This will be due at the end of class Friday, January 11th. Turn in a hard copy, and leave a copy in the shared folder.
Over the weekend, take still life photographs of any subject---your choice! We are going for BEAUTY! Experiment with the arrangement and lighting. You should use a minimum of five inanimate objects. Take some photos with flash and some without. Be creative! Think about the elements of composition we have just studied. Be prepared to work with your photos Monday, January 14th. A contact sheet of 12 will be due at this time. If you do not have your photos Monday, you will be writing a paper on still life photography while the rest of us work in PhotoShop. The 6 edited and best 5x7 are due at the end of class Tuesday, January 15th. The alternative assignment, a 3-page paper on Photographic Still Life, is due then as well. We will move on to the next topic the following week. Unless you are absent Tuesday, you are expected to have this project completed then.
http://webhome.idirect.com/~dpl/gallery1.html
http://www.betterphoto.com/gallery/dynoGall2.asp?cat=17
http://www.usefilm.com/photo_category/16/Pictures_of_Still_Life.html
http://www.apogeephoto.com/mag2-6/mag2-7winners.shtml
http://www.stilllifewith.com/2006/07/14/photo-contest-from-food-wine-magazine/
http://stilllifewith.com/2006/12/01/stw-challenge-for-december-tradition/
http://digitalmedia.oreilly.com/2004/09/15/food_photos.htmlhttp://www.markhemmings.com/MarkWebsite/food_photography/index.htm
http://dessertfirst.typepad.com/dessert_first/2006/05/food_photograph.html
Basic Principles of Still Life Photography:
Throughout the decades, artists have depicted still life scenes—arrangements of inanimate objects—in paintings and photography. Shooting still life subjects is one of the best ways to sharpen your photographic skills. You can take your time, and your subject remains stationary.
Good composition, framing and lighting are all very important to translate your still life into a great photo. Every day we are bombarded with still life images of appetizing foods, shiny housewares and other appealing products in magazine ads, brochures and catalogs. Professionals spend a great deal of time setting up these shots and you can learn a lot just by studying the photos you find most appealing and unique.
Notice how photographers use repeating shapes and lines to create patterns and use complimentary colors. Study the lighting that they use. Simplicity is very important when composing still lifes. You don’t need to collect a wide range of complicated objects to create an interesting picture. Instead, choose a few objects with a common thread.
The arrangement of a still life should begin with the positioning of a single dominant subject. Then add other objects one at a time, and examine the arrangement through your camera’s viewfinder. Experiment with your camera angle until the scene shows the elements in the most pleasing balance. Photograph the original grouping, and then rearrange or remove objects to see if it improves the composition.
Your next project will involve setting up a still life of specific objects and photographing it. To help prepare you, read the previously mentioned articles and find 6 still life photographs from the Internet that you particularly like. These photos should include only inanimate objects. Paste the 6 photos to a one-page word document (two columns) and write a short paragraph about each. Tell what techniques the photographer used that appeal to you. This will be due at the end of class Friday, January 11th. Turn in a hard copy, and leave a copy in the shared folder.
Over the weekend, take still life photographs of any subject---your choice! We are going for BEAUTY! Experiment with the arrangement and lighting. You should use a minimum of five inanimate objects. Take some photos with flash and some without. Be creative! Think about the elements of composition we have just studied. Be prepared to work with your photos Monday, January 14th. A contact sheet of 12 will be due at this time. If you do not have your photos Monday, you will be writing a paper on still life photography while the rest of us work in PhotoShop. The 6 edited and best 5x7 are due at the end of class Tuesday, January 15th. The alternative assignment, a 3-page paper on Photographic Still Life, is due then as well. We will move on to the next topic the following week. Unless you are absent Tuesday, you are expected to have this project completed then.
Thursday, January 3, 2008
Next Picture-Taking Assignment
Remember the Backlit Photos we took LAST YEAR??? Now you will take a backlit landscape. Go for beauty! Any sunrise or sunset would qualify. Watch your lens flares! Contact sheet of 12 is due Monday, January 7th.
Welcome Back!!
It was tough to get out on this COLD morning, wasn't it??? Today is your last opportunity to submit a photo for consideration for the upcoming art show. We will vote tomorrow to decide which ones get printed, matted, and will go to the show!
Your contact sheet/12 Hockney photos is due today. Also, please print a black and white contact sheet of 24. Cut these photos out and arrange into a practice collage on plain white paper. You must have my approval on this prior to beginning your final project on 18"x24" newsprint paper. Your practice collage will be graded, and is due by the end of class today. Final will be due next week. Before beginning final project, open each photo, adjust levels, brightness/contrast, and crop if necessary. Each small photo should look good on its own!
If you need to refresh your memory about Hockney, do so following the links in the previous posts.
Your contact sheet/12 Hockney photos is due today. Also, please print a black and white contact sheet of 24. Cut these photos out and arrange into a practice collage on plain white paper. You must have my approval on this prior to beginning your final project on 18"x24" newsprint paper. Your practice collage will be graded, and is due by the end of class today. Final will be due next week. Before beginning final project, open each photo, adjust levels, brightness/contrast, and crop if necessary. Each small photo should look good on its own!
If you need to refresh your memory about Hockney, do so following the links in the previous posts.
Thursday, December 20, 2007
Happy Holidays!!!
Hope you all have a WICKED SWEET Christmas and a SICK New Year!!! And don't forget to take those Hockney pictures! Ms. Finch
Wednesday, December 19, 2007
ART SHOW!
We have the annual Dare County Schools Art Show at Glen Eure's Gallery coming up mid-January. I would like EVERY student to submit one piece of photography for consideration for the show. Out of my approximate 60 students, we will only be able to enter a handful. I will allow you to vote on which ones get printed, matted, and entered for exhibition. I have placed a folder on the 'N' drive (shared area) for each student to leave the ONE 5x7 - 8x10 JPEG they want considered. You will receive a 100 or zero grade for participation in this. Deadline to drop your photos in the folder is December 21st.
Tuesday, December 18, 2007
The Photocollage
Background information and project details:
http://www.waunakee.k12.wi.us/TeachWeb/wagners/PhotoCollagehandout.doc
View some of David Hockney’s photocollages:
http://www.artchive.com/artchive/H/hockney/furstnbg.jpg.html
http://www.getty.edu/art/gettyguide/artObjectDetails?artobj=112574
http://www.artchive.com/artchive/H/hockney/hockney_mother.jpg.html
http://www.getty.edu/bookstore/titles/posthockney.html
Read about collages, and see some of Hockney’s work:
http://facweb.cs.depaul.edu/sgrais/collage.htm
More on David Hockney:
http://www.artchive.com/artchive/H/hockney.html
http://www.pbs.org/wnet/americanmasters/database/hockney_d.html
Experiment using your own photographs with the “Hockneyizer”:
http://bighugelabs.com/flickr/hockney.php
Another artist’s interpretation:
http://very.com/about.htm
Our holiday picture-taking assignment is going to be based on the work of artist, David Hockney. When we come back to class in January, you’ll put together a collage from the photos you take. You will need at least 50-100 pictures. Think seriously about your subject matter! You will need to take photos from every conceivable angle and distance. You will print it up, design the collage, and paste it together when we return to school!
Additional interesting reading:
http://www.austinkleon.com/?p=936http://www.koopfilms.com/hockney/articles.html
http://www.waunakee.k12.wi.us/TeachWeb/wagners/PhotoCollagehandout.doc
View some of David Hockney’s photocollages:
http://www.artchive.com/artchive/H/hockney/furstnbg.jpg.html
http://www.getty.edu/art/gettyguide/artObjectDetails?artobj=112574
http://www.artchive.com/artchive/H/hockney/hockney_mother.jpg.html
http://www.getty.edu/bookstore/titles/posthockney.html
Read about collages, and see some of Hockney’s work:
http://facweb.cs.depaul.edu/sgrais/collage.htm
More on David Hockney:
http://www.artchive.com/artchive/H/hockney.html
http://www.pbs.org/wnet/americanmasters/database/hockney_d.html
Experiment using your own photographs with the “Hockneyizer”:
http://bighugelabs.com/flickr/hockney.php
Another artist’s interpretation:
http://very.com/about.htm
Our holiday picture-taking assignment is going to be based on the work of artist, David Hockney. When we come back to class in January, you’ll put together a collage from the photos you take. You will need at least 50-100 pictures. Think seriously about your subject matter! You will need to take photos from every conceivable angle and distance. You will print it up, design the collage, and paste it together when we return to school!
Additional interesting reading:
http://www.austinkleon.com/?p=936http://www.koopfilms.com/hockney/articles.html
Catalog Page
We will be putting together a catalog page this week using photos you have taken in the past. You will be experimenting with the color replacement tool in PhotoShop to show an article of clothing in several different colors. You may even want to design a pattern to use! Your "advertisement" must include text. Think about your font and size of type, as well as your background choice. You want your catalog page to really grab the attention of your "buyer". This will be due on Thursday by the end of class.
Wednesday, December 12, 2007
Backlighting Project
Read the article at www.picturecorrect.com/photographytips/backlighting_photography_tips.htm
Read the article atwww.apogeephoto.com/may2005/wtbird5_2005print.html
Use the Internet to find six backlit photos that you particularly like. Copy and paste to a word document—one page, two columns. Write a short paragraph about each photo explaining what you find appealing about it. Turn in to completed assignments folder.
Take 35-40 photos that are backlit. These should be a mixture of natural scenes and scenes you set up, all close-up’s (within 8 feet of subject). FOR EACH SHOT, take one with a flash, and one without. Make a contact sheet of the best 12 (6 pairs). I am looking for photos where the backlighting is obvious, and enhances the subject.
Turn in the following photos for your final project grade:
-One 5x7 JPEG close-up, interior or exterior, with backlighting—no flash!
-The same close-up shot, backlit, but with fill light from a flash
The two identical photos should be placed side-by-side before submitting for grading.
When you complete this project, you will have three pages:
1) The word document with the six photos you found on the Internet and captions describing what you like about them
2) The two identical 5x7’s, one with flash and one without, mounted side-by-side
3) The contact sheet of your 12 best shots (6 pairs of identical shots with and without flash)Entire project is due at the end of class December 17th
Read the article atwww.apogeephoto.com/may2005/wtbird5_2005print.html
Use the Internet to find six backlit photos that you particularly like. Copy and paste to a word document—one page, two columns. Write a short paragraph about each photo explaining what you find appealing about it. Turn in to completed assignments folder.
Take 35-40 photos that are backlit. These should be a mixture of natural scenes and scenes you set up, all close-up’s (within 8 feet of subject). FOR EACH SHOT, take one with a flash, and one without. Make a contact sheet of the best 12 (6 pairs). I am looking for photos where the backlighting is obvious, and enhances the subject.
Turn in the following photos for your final project grade:
-One 5x7 JPEG close-up, interior or exterior, with backlighting—no flash!
-The same close-up shot, backlit, but with fill light from a flash
The two identical photos should be placed side-by-side before submitting for grading.
When you complete this project, you will have three pages:
1) The word document with the six photos you found on the Internet and captions describing what you like about them
2) The two identical 5x7’s, one with flash and one without, mounted side-by-side
3) The contact sheet of your 12 best shots (6 pairs of identical shots with and without flash)Entire project is due at the end of class December 17th
Wednesday, December 5, 2007
Next Photographic Assignment
Next Monday, December 10th, you will make a contact sheet of 12 "clothes modeling" type images. You should photograph a friend or relative, full-body, posed or candid. One person per photo. First we will use these photos in a People Collage. Later, we will be working with changing colors/patterns on the clothing and creating a catalog advertisement.
If you do NOT have your photos on Monday, you will be doing research and writing a paper on photographic catalog work while the rest of the class works in PhotoShop.
If you do NOT have your photos on Monday, you will be doing research and writing a paper on photographic catalog work while the rest of the class works in PhotoShop.
Tuesday, December 4, 2007
Portrait "Before and After" project
We have been practicing many techniques of retouching portraits, including whitening teeth, colorizing hair, nose job, frown to a smile, enhancing eyes and eyelashes, removing blemishes, wrinkles, and freckles, applying PhotoShop makeup, etc. I hope you have had an opportunity to experiment with several different techniques.
Your portrait project will be to ENHANCE four portraits through the retouching techniques we are learning, and show 'before' and 'after' shots. Make sure you don't permanently alter your original so you'll have a before photo to use for comparison! You'll make contact sheets of 4 photos, showing two before and after shots side-by-side per page. You'll hand in two contact sheets at the end of class on Friday, December 7th. That's a total of 8 photos---4 'before' photos, and 4 'after' on two contact sheets.I am looking for fairly drastic changes, so use your imagination! Some retouches will be natural-looking. I am not opposed to adding unusual things though (i.e. blue hair, whiskers, tattoos, etc.) Make sure everything you do enhances the image, not detracts from it. And keep it clean! If you are working on the face of a family member, friend, or classmate, make sure what you do will not offend! Your grade will be based upon the amount of work done, technical skill, and overall appearance of final photos. If you choose a harder portrait to fix, you'll likely get a higher grade than if you choose one that needs very little work. At least one photo of the four should include a vignette.
Your portrait project will be to ENHANCE four portraits through the retouching techniques we are learning, and show 'before' and 'after' shots. Make sure you don't permanently alter your original so you'll have a before photo to use for comparison! You'll make contact sheets of 4 photos, showing two before and after shots side-by-side per page. You'll hand in two contact sheets at the end of class on Friday, December 7th. That's a total of 8 photos---4 'before' photos, and 4 'after' on two contact sheets.I am looking for fairly drastic changes, so use your imagination! Some retouches will be natural-looking. I am not opposed to adding unusual things though (i.e. blue hair, whiskers, tattoos, etc.) Make sure everything you do enhances the image, not detracts from it. And keep it clean! If you are working on the face of a family member, friend, or classmate, make sure what you do will not offend! Your grade will be based upon the amount of work done, technical skill, and overall appearance of final photos. If you choose a harder portrait to fix, you'll likely get a higher grade than if you choose one that needs very little work. At least one photo of the four should include a vignette.
Friday, November 30, 2007
NHIs
Interims come out next Thursday, and several of you have NHIs that are causing your grades to be very low. I have posted the work you are missing on the board in each class. However, you should see me if you are at all unclear about what projects you still owe. Remember, I show NHI (zero) until all pieces of a project are submitted. Normally I will accept late work only one week past the original due date. In an effort to get some of your grades up before interims, I am offering any student in my 60-minute classes, the opportunity to turn in past due work until Tuesday, December 4th.
Last chance for 5 extra credit points on your next report card!
This is the last weekend of the Ansel Adams Exhibition at The Museum of the Albemarle in Elizabeth City. See my earlier post (in October) for details, or call 335-1453.
Thursday, November 29, 2007
weekend assignment
Next we will be retouching photos. This should be a lot of fun for you. You can whiten teeth, colorize eyes or hair, remove pimples or wrinkles, take off glasses or braces! Make sure you have lots of head and shoulders portrait shots to work with. Over the weekend, just take more portraits---young people and old, candid and posed. We'll practice our retouching techniques for a couple of days and then begin work on a BEFORE and AFTER project. Make sure you don't change your originals so you have the BEFORE shots!
Wednesday, November 28, 2007
What is CRITIQUE????
What is CRITIQUE????
Critique \Cri*tique"\, v. t. [Cf. Critic, v.] To criticise or pass judgment upon. [Obs.] --Pope.
Critique \Cri*tique"\ (kr?-t?k"), n. [F. critique, f., fr. Gr. ???? (sc. ????) the critical art, from ?????. See Critic.] 1. The art of criticism. [Written also critic.] [R.] 2. A critical examination or estimate of a work of literature or art; a critical dissertation or essay; a careful and through analysis of any subject; a criticism; as, Kant's "Critique of Pure Reason.''
Here’s an excerpt from an article that I found interesting on the topic:
The Photographic Critique as a Learning Experience
by Joseph Meehan
Although the word “critique” is rooted in the concept of criticism (“a judgment of what is wrong”), a successful photographic critique should result in a positive outcome for the photographer. That is, the experience should help the photographer better understand how his or her work is being perceived as a basis for improvement. This typically begins with the reviewer reacting to how well the overall visual message is stated. In doing so a professional reviewer is expected to remain objective while identifying the specific strengths and weaknesses of a photograph. It is not very useful, for example, to simply say they like or dislike a particular image without explaining why.On the other hand, the photographer needs to approach this process with the proper motivation and attitude. Most importantly, to understand that the work is being evaluated in terms of how it appears to the professional conducting the critique. If there is a disconnection between the impressions of the reviewer and what the photographer intended, then something is obviously wrong. Identifying why the message was not clearly perceived should be balanced with an emphasis on how things can be done better or even to identify missed opportunities.
See the full article with examples at:http://www.photoworkshop.com/critiquing
Definition of the different types of critique:www.scphotogs.com/articles/critique.pdf
Please pay special attention to the portion about ‘Peer Review”, which is what we are doing when we critique photos in class (pp. 5-7).
Peer Review
What it is:
A peer review is one of the most common forms of critique available. As peers, this means that the photographer is receiving a critique from other photographers. A peer review means that your feedback is no longer just Aunt Betty seeing a sunset shot and saying “Nice.” It consists of a peer that can consciously recognize the smoothness of the water, the sharpness (or lack thereof) throughout the image, as well as changes in color tones and contrast.Since fellow photographers are more aware of these technical merits, they can actually comment on them with a certain degree of “expertise”. These are typically the types of critiques one will see requested and given in photo communities like www.photo.net, www.fredmiranda.com, www.dpreview.com. The very nature of these communities is that they serve as a venue to present and share images with your peers, as well as to give and receive useful critiques and analyses of your imagery.What it is good for:Peer review is typically good for individuals who would like some objective analysis and feedback on what is good about their imagery, including times where there are areas that could use improvement. It takes a tougher skin to accept reviews of this nature, because you may get feedback that points out flaws either in your technique, style, equipment, or any combination of these. So, be forewarned, if you ask for a peer review; be prepared to perhaps hear things you wouldn’t get from Aunt Betty or your sister, Mary.ExpectationsSince this is a peer review, the typical expectation is that the reviewer will give their thoughts on some of the technical aspects of the image as presented. Likewise, for the one receiving feedback, you likely are not going to get the typical sunshine and glowing responses that you get from Aunt Betty and your sister Mary. These reviews will likely include comments such as “I like the composition here, but it looks like your horizon isn’t straight. You may want to fix that.”So, what technical aspects can the submitter expect to get critiqued on? This varies, depending on the skill, experience, and breadth of knowledge on the part of the reviewer. In general though, there are 7 key areas that people look at when critiquing photographs on their technical merit:
1.Depth of Field (DOF) and Focus – Often confused with sharpness, DOF and focus speak to the entire image, rather the main subject. Depth of field considers the impact of blur and sharpness throughout the image. Questions often considered include: Is the entire image in focus or are some partsblurred or out of focus? Is it blurred only in a particular region of the image (foreground, middle ground or background)? How does the DOF impact the subject? Does the blurring of the foreground and/or background help or detract from the image?
2.Exposure – Are there any areas of the image that are completely black (no shadow detail) or white (no highlight detail)? Does this help or detract from the image?
3.Lighting – What type of lighting exists? Is it soft even lighting, or harsh spot lighting? In either case, does it produce a visually appealing or stimulating result? Does that result help or detract from the image?
4.Sharpness – Often confused with depth of field and focus, this factor looks specifically at the subject of the image. Is it slightly out of focus( soft), completely out of focus (usually as a result of camera or motion blur), or spot on (tack sharp for the entire subject matter)? Is the effect (soft, blurred, or spot on) intentional, and if so, does it enhance or detract from the image?5.Lines – Are lines present and/or are they used effectively within the image? Lines are used in photography to guide the viewer through an image. Lines can take several forms in photographs. Curving landscape, the arrows of an bird’s feathers, the rippling circles of a water drop, the repeating pattern of bark on a tree, the random meanderings of vines across a wall, the veins of a leaf, the bold architectural lines or a church steeple or suspension bridge, and even abstract lines of blurred grass in the wind are all examples of how lines can be powerful anchors to an image that stimulate and direct the viewer to and through points of interest in a picture. Their presence or absence and effective placement can make or break an image.
6.Color – Are colors accurate, vibrant, or non-existent? If the skin tone is off or not corrected during post-processing, this can decrease the appeal and quality of an image in the eyes of a reviewer. Likewise, if colors are flat or subdued, depending on the nature of the image this can either enhance or detract from overall image quality. Finally, lack of color can also have a very powerful impact on images. The notoriety and recognition that one of photography’s most famous, Ansel Adams, and his presentations of black and white imagery is still seen today in the work of people that strive toward those particular ends.
7.Composition/Originality – When critiquing photographs, some basic rules of composition can be used to measure the overall appeal. One of the most famous, the Rule of Thirds (ROT), is often applied to determine whether the composition of an image is “on” or “off”. Often times, images may not adhereto the ROT principle by intent, to produce a new and original perspective.
Since the composition and originality of an image is often subjective by nature, it can be difficult to quantitatively measure this. Nevertheless, the composition of an image is probably the fundamental cornerstone upon which imagery is presented. If the composition is not there, it does not matter whether the colors are accurate, sharpness is present, with beautiful even lighting, or depth of field is effective. The image will likely not be received well if it does not stimulate or engage the viewer on some level.Generally, peer reviews will usually address one or more of the above technical merits, as well as offer general feedback. Commentary can vary wildly depending on the familiarity level the reviewer and the submitter have with one another, the type of community, and how it’s presented. (Is it done by means of an email, private message, or other one-on-one communication, or is it done in an open community where everyone can read the review?)
What it is not good for:
Peer review is generally not good for images presented outside the parameters of a peer review area. Typically photo communities like the ones mentioned above, or groups and gatherings of photographers in an organization (like regional clubs that meet regularly to share and critique each others works) are where peer reviews are done. If someone has images on a web log, or on a website as a gallery, this is not the venue for conducting peer reviews.From a reviewer’s perspective, this is also not the place to leave generic and/or non-specific commentary. Usually responses like “Nice”, “overblown” or “I like this” will not be of much help because there is nothing specific that the submitter is getting back that either they need to work on, or that they know they are doing correctly.
For a tutorial on Professional Photographic Critique:
http://tips.romanzolin.com/articles/article004.php
Another, on Professional Critique:
http://www.naturephotographers.net/je1001-1.html
Important Excerpts—Goals toward writing an effective critique:
Start off by taking some time to truly study the image and form an opinion of what appeals to you about the image, both technically and aesthically. Sometimes coming back to study the image again a short time later is helpful.After forming an overall impression of the image, begin to identify the specific technical qualities of the image (lighting, color, contrast, composition, depth-of-field, background, etc.) that appeal or don't appeal to you. In just about any image, you can find both. Do the same with the aesthetic qualities of the image by describing any emotional response the image imparts. It's not uncommon to find images that are technically deficient, but yet impart a strong emotional response from the viewer, and visa versa. Feedback to the photographer on both the technical and aesthetic aspects of an image is useful.Search for the words and phrases that most effectively convey your thoughts about these specific qualities.Begin the written critique with what you like about the image. It is a mistaken belief that a photo critique should only point out what is wrong. In fact, as much can be gained by pointing out what it is that appeals to the viewer.Out of the image qualities that you feel need improvement, pick those qualities that you can most effectively communicate why you think they need improvement, and how an improvement of those qualities would help improve the image.Whenever possible, offer suggestions based on first-hand experience on how to improve those image qualities that you found lacking.
Tuesday, November 27, 2007
Help with Compostion
By now you should know a lot about photographic composition! You've seen my in-class demonstrations with explanations of the individual theories of composition. You've done some reading, watched films, researched the Internet, and written a paper. To further help prepare you for the test Thursday, please follow these links for some good additional reading. See me if there is any topic you are unsure about. This may be the most important thing we'll cover as it effects EVERY picture you take! http://photoinf.com/General/Wendy_Folse/Composition_Part_I_Theme_Emphasis_Simplicity_Rule_of_Thirds.htm
http://photoinf.com/General/Wendy_Folse/Composition_Part_II_Horizontal_or_Vertical.htm
http://photoinf.com/General/Wendy_Folse/Composition_Part_III_Perspective_Focal_Point_Cropping.htm
www.larrysizemore.com/articles/COMPOSITION.pdf
http://www.scphoto.com/html/composition.html
http://photoinf.com/General/Wendy_Folse/Composition_Part_II_Horizontal_or_Vertical.htm
http://photoinf.com/General/Wendy_Folse/Composition_Part_III_Perspective_Focal_Point_Cropping.htm
www.larrysizemore.com/articles/COMPOSITION.pdf
http://www.scphoto.com/html/composition.html
Test on Composition
...will be Thursday. You will need your camera. Those who forget cameras, don't have sufficient batteries, don't have cords, etc. will take an essay test in the advancement center while others complete the photo-taking test outside. For this test, you will need to understand the composition terms we have learned. I will give you a list of pictures to compose on your own during the class period. You will download them and make a contact sheet to turn in. Review is Tuesday and Wednesday. Also, go over the paper you wrote to refresh your memory!
Monday, November 19, 2007
Collages/Thanksgiving assignment
This short week you should first turn in anything you are missing, then practice techniques for making collages. I have demonstrated it for you on the big screen in class, but if you have any further questions, please do not hesitate to call me over. Don't forget to alter the opacity, and you can apply different filters to each layer. Do not flatten layers until you have finished. You may also use text if you wish. Make sure all photos have something in common. Good collages tell a story. The key is to combine objects of different scale. Pair distance shots up with macros. Use full body shots together with close-up facial pics.) Do your best on this practice collage, and turn in Tuesday. It will be graded as classwork. We will do a collage project when we return from Thanksgiving. This one will be for a full project grade. Your topic is family/relationships. Take all photos over the holiday. Contact Sheet of 12 due 11-26. Your final Family/Relationship themed collage, using elements from at least four photos, will be due on Friday, November 30th.
Thursday, November 15, 2007
Photography Contest
I was asked to pass this info along to you: (LF)
Hi
Sandy Semans sent this to me to forward to ya'll - this could make a great project, or something for kids to do on their own.
Thanks, and enjoy your day.
sharon
>Dear Refuge Supporter:
>
>This year, for the first time, the 2008 Refuge Photography Contest is
>accepting entries from youth! If you know a photographer under the age of
>18, direct them to the attached flyer and NWRA's site, www.refugenet.org,
>for details on how they can enter for a chance to win.
>
>How to Enter:
>
>1. Select either the Senior Youth category, ages 14-17, or the Junior Youth
>Category, ages 13 and below.
>
>2. Choose up to 10 photographs taken on a National Wildlife Refuge within
>the past three years.
>
>3. Submit your image(s) online at www.refugenet.org before December 15,
>2007.
>
>Five top winners in each category will receive a prize and the chance to
>have their image appear in future NWRA publications! Go to
>www.refugenet.org and click on "2008 Refuge Photography Contest" to learn
>more. If you have any questions, please contact Claire Stoker at
>cstoker@refugenet.org or (202)333-9075, ext.25.
>
>Thank you.
>
>--
>National Wildlife Refuge Association
>1901 Pennsylvania Avenue NW, Suite 407
>Washington, D.C. 20006
>Ph. 202-333-9075
>
Hi
Sandy Semans sent this to me to forward to ya'll - this could make a great project, or something for kids to do on their own.
Thanks, and enjoy your day.
sharon
>Dear Refuge Supporter:
>
>This year, for the first time, the 2008 Refuge Photography Contest is
>accepting entries from youth! If you know a photographer under the age of
>18, direct them to the attached flyer and NWRA's site, www.refugenet.org,
>for details on how they can enter for a chance to win.
>
>How to Enter:
>
>1. Select either the Senior Youth category, ages 14-17, or the Junior Youth
>Category, ages 13 and below.
>
>2. Choose up to 10 photographs taken on a National Wildlife Refuge within
>the past three years.
>
>3. Submit your image(s) online at www.refugenet.org before December 15,
>2007.
>
>Five top winners in each category will receive a prize and the chance to
>have their image appear in future NWRA publications! Go to
>www.refugenet.org and click on "2008 Refuge Photography Contest" to learn
>more. If you have any questions, please contact Claire Stoker at
>cstoker@refugenet.org or (202)333-9075, ext.25.
>
>Thank you.
>
>--
>National Wildlife Refuge Association
>1901 Pennsylvania Avenue NW, Suite 407
>Washington, D.C. 20006
>Ph. 202-333-9075
>
Macro--second chance!
I was searching for some really good macros to put on channel 19, but I was disappointed that I found very few. So many of the macros students turned in were out of focus! That is automatically a failing grade. Please do not EVER turn in a photo where the main subject is not in clear focus!!! Also, I saw many shots on the contact sheets that I thought were better than what was submitted as the best photo.
I want to give you a second chance to get a good grade on this project. I'm asking all my classes to resubmit a macro photo. It does not have to be from the macro project. It can be from any photo shoot as long as it was taken by you this semester.
I have placed a folder on the shared drive for this submission. Label this one with your full name so you can get credit for it if yours is selected for tv! When I grade the macros, I will choose your better shot--either the one you originally submitted or the new one. I will grade whichever one will give you the highest grade on this project
I want to give you a second chance to get a good grade on this project. I'm asking all my classes to resubmit a macro photo. It does not have to be from the macro project. It can be from any photo shoot as long as it was taken by you this semester.
I have placed a folder on the shared drive for this submission. Label this one with your full name so you can get credit for it if yours is selected for tv! When I grade the macros, I will choose your better shot--either the one you originally submitted or the new one. I will grade whichever one will give you the highest grade on this project
Short day Friday
Don't forget about the pep rally Friday which will make for shortened class periods. Make sure you are budgeting your time wisely. Your paper and Landscape project are due.
Tuesday, November 13, 2007
Next Photo Shoot...
Your next photo shoot will be a portrait. I'd like you to try hard to duplicate portrait studio quality. This should be of only one person--head and shoulders. Pay attention to your lighting and background. As always, take the equivalent of one roll of film--or 35-40 shots. That should give you enough to choose from to submit your contact sheet of 12 on Monday, November 19th. We will be doing quite a bit of work with these portraits, so please make sure you have enough! As always, you should take a minimum of 35-40 different shots. Remember, imperfect faces are more fun to retouch!
Thursday, November 8, 2007
Thank You cards for Vets
We will be making thank you cards for our Veterans today in class using your photography. Thank you in advance for contributing to this effort. It is strictly voluntary. The package will go out at 3:30 today. If you choose not to make a card, you should be working on your Compostion Research Paper.
Monday, November 5, 2007
Landscape/Seascape
Your next photo assignment will be due on Tuesday, November 13th. It will be a landscape or seascape shot. It can be farmland, the beach, a woodsy location, etc. This shot can contain structures or people, but they should be incidental---think calendar shot. Once again, you should take 35-40 shots that meet this criteria. Please use your imagination and make it creative!! We will use 12 for our contact sheet on November 13th. We will further develop six through PhotoShop and make a contact sheet of the six edited photos. Then, narrow it down to the one best photo to turn in for a grade. Six edited photos on a second contact sheet and final 5x7 JPEG are due on Friday, November 16th.
Research Paper on Composition
Plan and write a report on Photographic Composition. Use the books in the classroom and/or photography sites on the Internet for your research. Include each of the following topics:
Lens choice
Rule of thirds
Background choices
Depth of field
Perspective
Framing
Point of View
Use of lines, shapes, form, pattern, textures, etc.
Explain each topic and include photos which are examples of each. You may use your own photos, or get them off the Internet. If you get photographs from the Internet, remember that you must give credit to your sources. Give photo credit under each picture in your report. If you use your own pictures, be sure to give yourself credit! Write your paper in essay form, in your own words. DO NOT COPY AND PASTE! Be sure spelling and grammar are correct, your examples look good, and your paper is well organized. List “Works Cited” at the end (bibliography).
Grading will be as follows:
Opening---What is composition? (5 points)
Lens choice, explanation and examples of several (10 points)
Perspective, explanation and examples (10 points)
Subject/Rule of thirds, explanation and examples (10 points)
Choice of Background, explanation and examples of good and poor choices (10 points)
Depth of Field, explanation and examples of several types (10 points)
Framing, explanation and examples (10 points)
Point of View, explanation and examples of each type (10 points)
Use of lines, shape, form, pattern, texture, etc., explanation and examples of each (10 points)Closing---Summary (5 points)
Layout, general appearance, and ‘Works Cited’ (10 points)
Paper will be due on Friday, November 16th.
Lens choice
Rule of thirds
Background choices
Depth of field
Perspective
Framing
Point of View
Use of lines, shapes, form, pattern, textures, etc.
Explain each topic and include photos which are examples of each. You may use your own photos, or get them off the Internet. If you get photographs from the Internet, remember that you must give credit to your sources. Give photo credit under each picture in your report. If you use your own pictures, be sure to give yourself credit! Write your paper in essay form, in your own words. DO NOT COPY AND PASTE! Be sure spelling and grammar are correct, your examples look good, and your paper is well organized. List “Works Cited” at the end (bibliography).
Grading will be as follows:
Opening---What is composition? (5 points)
Lens choice, explanation and examples of several (10 points)
Perspective, explanation and examples (10 points)
Subject/Rule of thirds, explanation and examples (10 points)
Choice of Background, explanation and examples of good and poor choices (10 points)
Depth of Field, explanation and examples of several types (10 points)
Framing, explanation and examples (10 points)
Point of View, explanation and examples of each type (10 points)
Use of lines, shape, form, pattern, texture, etc., explanation and examples of each (10 points)Closing---Summary (5 points)
Layout, general appearance, and ‘Works Cited’ (10 points)
Paper will be due on Friday, November 16th.
Thursday, November 1, 2007
Perspective vs.Point of View
Quite a few of you seem to be having difficulty understanding the difference between these two terms. I'd like to try to clarify this for you.
PERSPECTIVE:
Imagine standing on a path with a row of trees running along the side. As you look out to a point on the horizon, you’ll naturally see that the path, and the trees appear to get smaller the further away they are from you. This demonstrates the principle of linear perspective. When you shoot a photo that clearly shows linear perspective (objects getting smaller the further they are away from you), you visually add a greater sense of depth to the image. An explanation based upon the rules of geometry can be found at http://www.ski.org/CWTyler_lab/CWTyler/Art%20Investigations/PerspectiveRules/PerspectiveRules.html . A less complicated explanation which addresses the topic as it relates to art is presented at http://www.handprint.com/HP/WCL/tech10.html .
POINT OF VIEW:
Point of view refers to the physical location of the camera with respect to the subject. Every scene has many points of view. Your job is to find a viewpoint that is unique and interesting. There is no law that says all pictures have to be taken from eye level and straight on. In fact, this type of photo is usually somewhat boring and uninspired. By taking a picture from a different angle, you can produce a totally new feeling, mood or effect. The worm's eye view can be pretty interesting. By lying down on your stomach, you can get flowers in the foreground to frame your subject. If you are taking pictures of small children or pets, getting the camera down on their level can improve results. You can also avoid cluttered or ugly background by changing your point of view. Climbing up on things and looking down from a high point of view offers lots of different opportunities. The creative photographer will experiment with many different positions of the camera. Read more about this at http://www.montenagler.com/Article021906.asp
PERSPECTIVE:
Imagine standing on a path with a row of trees running along the side. As you look out to a point on the horizon, you’ll naturally see that the path, and the trees appear to get smaller the further away they are from you. This demonstrates the principle of linear perspective. When you shoot a photo that clearly shows linear perspective (objects getting smaller the further they are away from you), you visually add a greater sense of depth to the image. An explanation based upon the rules of geometry can be found at http://www.ski.org/CWTyler_lab/CWTyler/Art%20Investigations/PerspectiveRules/PerspectiveRules.html . A less complicated explanation which addresses the topic as it relates to art is presented at http://www.handprint.com/HP/WCL/tech10.html .
POINT OF VIEW:
Point of view refers to the physical location of the camera with respect to the subject. Every scene has many points of view. Your job is to find a viewpoint that is unique and interesting. There is no law that says all pictures have to be taken from eye level and straight on. In fact, this type of photo is usually somewhat boring and uninspired. By taking a picture from a different angle, you can produce a totally new feeling, mood or effect. The worm's eye view can be pretty interesting. By lying down on your stomach, you can get flowers in the foreground to frame your subject. If you are taking pictures of small children or pets, getting the camera down on their level can improve results. You can also avoid cluttered or ugly background by changing your point of view. Climbing up on things and looking down from a high point of view offers lots of different opportunities. The creative photographer will experiment with many different positions of the camera. Read more about this at http://www.montenagler.com/Article021906.asp
Next Photo Assignment
Our next picture-taking assignment will be landscape/seascape. To help prepare you, check out these web sites:
http://www.sceniclightimage.com/
http://www.landscapephotography.com.au/
http://www.samburns.com.au/
http://forrestcroce.com/
http://perspectivesphotography.net/
http://www.nyip.com/ezine/outdoors/landscapes.html
http://www.photographytips.com/page.cfm/77
http://www.luminous-landscape.com/
http://www.sceniclightimage.com/
http://www.landscapephotography.com.au/
http://www.samburns.com.au/
http://forrestcroce.com/
http://perspectivesphotography.net/
http://www.nyip.com/ezine/outdoors/landscapes.html
http://www.photographytips.com/page.cfm/77
http://www.luminous-landscape.com/
"Theories of Composition" photo shoot
We will be going outside today to begin the following project. You should take any missing photos over the weekend. This project is due, in full, on Monday, November 5th. As we move along in our composition unit, you will get a test that is very much like this project. It would be a good idea to practice taking all 20 shots, even though only 12 are required on your contact sheet. You'll have time on Monday to prepare the word document. You'll get a handout today. Here are the instructions:
We have studied various elements of design and techniques for achieving good photographic composition. Your assignment is to take a number of photographs that illustrate the following:
· Proper use of the Rule of Thirds
· Good choice of background to accentuate subject
· Depth of field used to accentuate the subject (selective focus)
· Perspective lines used to create depth
· Demonstration of scale
· Framing with objects in foreground
· Unusual point of view to create interest
· Dynamic composition with proper use of diagonals
· Emphasis on texture
· Use of repetition (either color, shape, or line)
· Good use of negative space
· Asymmetrical balance
· Positioning action moving into frame
We have also discussed design mistakes that should be avoided. Take photos that illustrate what NOT to do:
· Merging
· Poor choice of background
· Subject moving or looking out of frame
· Undesirable cut-off
· Centered composition (boring, static)
· Lens flare
· Lack of simplicity where subject is not clearly defined
Download the photos and make a contact sheet showing 12 different topics outlined above. Do not edit in PhotoShop! Use them just as they came out of camera. Title each photo to indicate what you are illustrating. Select the six that you feel best illustrate six different topics. Copy and paste to a Word document with a paragraph about each photo. You should describe how each photo depicts good composition through the proper use of these techniques or poor composition because of design mistakes.
We have studied various elements of design and techniques for achieving good photographic composition. Your assignment is to take a number of photographs that illustrate the following:
· Proper use of the Rule of Thirds
· Good choice of background to accentuate subject
· Depth of field used to accentuate the subject (selective focus)
· Perspective lines used to create depth
· Demonstration of scale
· Framing with objects in foreground
· Unusual point of view to create interest
· Dynamic composition with proper use of diagonals
· Emphasis on texture
· Use of repetition (either color, shape, or line)
· Good use of negative space
· Asymmetrical balance
· Positioning action moving into frame
We have also discussed design mistakes that should be avoided. Take photos that illustrate what NOT to do:
· Merging
· Poor choice of background
· Subject moving or looking out of frame
· Undesirable cut-off
· Centered composition (boring, static)
· Lens flare
· Lack of simplicity where subject is not clearly defined
Download the photos and make a contact sheet showing 12 different topics outlined above. Do not edit in PhotoShop! Use them just as they came out of camera. Title each photo to indicate what you are illustrating. Select the six that you feel best illustrate six different topics. Copy and paste to a Word document with a paragraph about each photo. You should describe how each photo depicts good composition through the proper use of these techniques or poor composition because of design mistakes.
Subscribe to:
Posts (Atom)






.jpg)