Tuesday, October 30, 2007
IMPORTANT: NHI's
You all know the rule that late work is only to be accepted ONE WEEK following the original due date--and then with a letter grade deduction. Several students have not submitted one or two projects, and this is having a serious detrimental effect on your grade. Since projects make up such a large percentage of your grade in Photography, missing even one can cause your overall score to drop a letter grade. If you have NHI's (Assignments 'not handed in'), FOR THIS WEEK ONLY, I will accept any projects you have missed---whatever the reason. You MUST submit the entire project (including contact sheets) to the late folder by Thursday. Your grade will reflect how late the project is, and whether or not you hurried through it---but at least you'll get rid of your NHI (zero). This is a one-time offer! Next week we'll go back to the rules as they were set up at the beginning of the year.
Thursday, October 25, 2007
Test Tuesday
You will have your test on cameras and exposure on Tuesday. We will review Friday. If you have any questions, please see me. I will hand out a study guide with all the info you'll need. Our next unit will be 'Composition'!
Wednesday, October 24, 2007
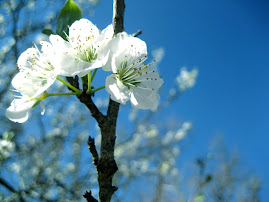
Macro photo assignment
Our next picture-taking assignment will be macro photography. To help prepare you, please do some Internet research. View lots of macros and read up on tips for taking good macros. Find six photos on Internet that you particularly like, paste to a word document, and write a short paragraph telling what it is about that photo that you like. You should have 35-40 NEW, UNIQUE macro shots by Monday, October 29th. A contact sheet of six edited photos, and your best 5x7 are due on Thursday, November 1st. On this assignment, I will allow you to use any creative filter you like. You may use color, black and white, or duotone. Just make sure whatever you do ENHANCES the photo, and does not detract from it!
Monday, October 22, 2007
This week's assignments
For the B&W Student Choice, a contact sheet of 12 new, UNIQUE photos is due today (Monday). These can be straight out of the camera. You do not have to make them black and white before creating the contact sheet. Edit a minimum of six photos. Crop for the best shot. Make them black and white either by desaturating, or using the grayscale mode. Adjust levels and brightness/contrast. This is the most important feature in black and white photography. Correct any obvious mistakes. Once you have six photos as perfect as you can make them, make a contact sheet. Don't forget to change the numbers so that the photos take up the whole page. Turn in the contact sheet of six edited photos, and the best 5x7 JPEG. You should also experiment with duotone. Turn in your best duotone. You'll need to copy and paste to a new canvas in order to make it a JPEG. So, for the B&W project you are turning in 4 pieces---contact sheet of 12 straight out of camera, contact sheet of 6 edited, best b&w 5x7 JPEG, best duotone 5x7 JPEG. You should have these in the completed assignment folder by Friday.
We will also continue to work on the 3 worksheets (Digital Book pp.10-35). When I have checked you off on this assignment, you may begin the PhotoShop Tools Exercise (or 'PAINT' project). This project does not require a photo at all. You will experiment with lots of new tools and techniques! The process is more important than the finished product. You'll learn where these tools are in PhotoShop, and what they do! If you finish a picture before you finish the list of tools, start another. Save your picture/pictures in the completed assignments folder by Friday.
We will also continue to work on the 3 worksheets (Digital Book pp.10-35). When I have checked you off on this assignment, you may begin the PhotoShop Tools Exercise (or 'PAINT' project). This project does not require a photo at all. You will experiment with lots of new tools and techniques! The process is more important than the finished product. You'll learn where these tools are in PhotoShop, and what they do! If you finish a picture before you finish the list of tools, start another. Save your picture/pictures in the completed assignments folder by Friday.
Friday, October 19, 2007
PhotoShop Exercise
We've been working in the Digital Book with our three worksheets. Hopefully you're beginning to understand all about how digital photography works. In the meantime, I want you to continue to practice in PhotoShop. The morre time you spend in PhotoShop, the better you'll get. There will ALWAYS be something new to learn and master with this program! As you finish the reading (pp. 10-35) and the worksheets, please see me to get the PhotoShop Exercise ("Paint" Project). This project will help you explore some of the features of PhotoShop, and learn where to find them!
>>>PhotoShop Exercise
Experiment with Toolbox/Options
Make a painting using each of the following techniques. Start with a blank page (no photograph). You may want to consult your handout of the Toolbox map (Toolbox is on the left of your screen; Options windows on the right; Menu bar at top). Briefly describe what you did for each step on the back of this page or on notebook paper.
*Open Adobe PhotoShop from ‘Programs’ or icon on desktop
*From Menu Bar--- File>new--- Create a blank page, 8"x10" RGB, 200 ppi, 16 bit
*From Menu Bar---Window>brushes, history, layers, color, swatches, tools, options (make sure these items are checked/window appears on the left of your screen for each)
*Select each of the following from the Toolbox and create a “painting”:
pencil (use several sizes)
paint brush (use custom brushes--select load brushes from Brush Palette menu; use texture brushes; pick several different sizes and shapes of brushes; experiment with options in Menu Bar---diameter, softness, mode, opacity, flow; click on all arrows to get other options; use airbrush-- experiment with adjusting pressure)
paint bucket (to fill in large areas)
*Select colors from Color Palette window—experiment with tabs (color, swatches, styles) *Experiment with color selection options in Toolbox (the two blocks of color, black, white, or whatever color you chose last)--background, foreground, switch colors using arrows
*Use Adobe color picker (click arrow in Color Palette window)
*Create several new layers (Layer>new); Copy something from background and paste to another layer-- Rename to indicate what’s there by double clicking on layer (the layer will be blue to indicate which one you’re accessing) Put something on each layer
*Use the eye dropper from the Toolbox to select a color from within the picture and repeat somewhere else
*Experiment with opacity (in Layer window) and other options (click arrow)
*Select an area with magic wand from Toolbox; Extend selection with wand by shift/click
*Experiment with layer styles (the cursive ‘f’ icon at the bottom of the Layer window)
*Soften an item on a layer by using filter>blur>Gaussian Blur
*Change the order of layers by dragging one to the bottom in the Layer window
*Experiment with show/hide buttons in layers (the 'eye' icon)
*Paint using the Wet Edges option in Brush window
*Use gradient (Toolbox); Experiment with all options
*Paint straight lines with shift/click
*Try the special effects brushes from the Menu Bar (click arrow)
*Experiment with feathering edges by using anti-alias (Menu Bar) before selecting an item with lasso: Feather edges on existing selections with Select>feather, an amount>ok
*Use the various eraser tools in Toolbox
*Use the zoom tool to work in small areas (Toolbox)
*Experiment with Edit>Transform>(All options---from Menu Bar)
*Add text/Enhance text with a special effect---‘T’ from Toolbox, then Layer>Layer Style>(experiment with your choice of special effects) from Menu Bar
*When painting is complete, experiment with various filters, particularly Artistic options and Sketch options
*Save in 'Completed Assignments' folder using your id#, then 'Paint Activity'
*Turn in your sheet with a brief description of what you did during this exercise
*This will be graded as a Project—DO A GOOD JOB!
Thursday, October 18, 2007
Some Web Sites
Some interesting web sites (might help you on the upcoming test!):
www.howstuffworks.com/camera.htm
www.andylim.com/photo/
Read about exposure, depth of field, aperture and shutter speed
www.howstuffworks.com/camera.htm
www.andylim.com/photo/
Read about exposure, depth of field, aperture and shutter speed
ANSEL ADAMS EXHIBITION!!
There is a groundbreaking exhibition of about 50 images by famous photographer, Ansel Adams, on display in Elizabeth City! These particular photos document a cruise he took on the Intracoastal Waterway in 1940. Many images are from North Carolina fishing villages. This is only the second time this collection of photos has ever been shown. You can contact the Museum of the Albemarle at 335-1453 for more details. If you visit the museum to see this collection prior to December 2nd, you will receive an extra credit of 5 points on your next report card!! You must bring back proof that you visited (a program personalized to you by the museum director, for example), and you should write a couple of paragraphs telling what you saw and giving your opinion of the work. This is a good way to boost your grade and get to see, up close and personal, the work of a true pioneer of art photography!
Wednesday, October 17, 2007
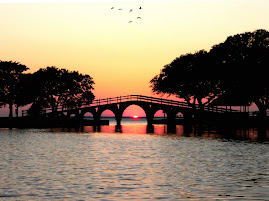
B&W Student Choice
Your next photo shoot will be student's choice of subject matter, black and white. TAKE THE PHOTOS IN COLOR!!....But think Black and White! We will take the color out through PhotoShop. You can take color out of a color photo, but you can never put color into a photo taken in B&W! Use subject matter that is VERY high contrast. Make sure you have bright light. Read up and look at examples of black and white photography before you begin to help you select subject matter. 35-40 shots are due on Monday, October 22nd. Make your photos UNIQUE and interesting!! Use creativity and give this project some thought!
Wednesday, October 10, 2007
Disappointed!!
I'm sorry to say that it has come to my attention that some of you have been turning in work as your own that was prepared by others. Some students have shared photos, and some have stolen them from others. I am extremely disappointed! I feel the need to remind you at this time of the Honor Pledge you all signed at the beginning of the school year. In part it reads:
"The student that is taking the course must photograph all work that is turned in for a grade. Unless specifically stated by the student, all work should be taken during the semester they are enrolled in photography or digital media. If a student violates this rule, they will receive a zero for the assignment and will be referred to the Administration. As proof of student compliance, each student is required to make contact sheets of all images. These sheets will be kept on file by the student and be reviewed...."
You MUST take all your own photos! You should take them after they are assigned, and before they are due. You MUST keep a copy of your contact sheets, and any photos you turn in on the contact sheet or as a final project for a grade. If asked to produce these photos, you must be able to show them in your folder on the 'N' drive. Otherwise, you will take a zero. Do NOT delete photos!!! Do NOT go into any other student's folder!! Do NOT copy any other student's work!! Get out there with your cameras and take some pictures if you want to pass this course!
Tuesday, October 9, 2007
Butterfly Garden Field Trip
Since your next photo-taking assignment involves nature, I would like to take you all to the Butterfly Garden on Thursday, October 11th. This field trip will ONLY be for those who have made sufficient progress on their Spirit Week Project (or the alternative), the 8-1 assignment, and the Layers Tutorial, and who bring their cameras to class. Those who still have written work to do will be going to the library instead. If the majority of the class is behind on assignments, we will have to skip the field trip altogether.
Monday, October 8, 2007
Alternative Assignment
Apparently quite of few of you (particularly in my 5th period class) did not bother to take any photos during spirit week, and so you are unable to complete this week's project. If you did not get enough spirit week photos, you may elect to do the following assignment instead. I feel that an alternative assignment should require an equal amount of effort as displayed by those who actually took their cameras out all week and got their photos, and the editing and caption-writing they are to do this week. That's only fair to the ones who put forth the effort to do the assignment.
Therefore, as an alternative to the Spirit Week project, you may hand-write a five page paper expressing to me how you might become a better Photographer and a better Student of Photography. You may analyze specific study skills which would enhance your performance in class. You may talk about specific strategies you could adopt. You might also explore the different types of photography which appeal to you, and how you can become a better photographer by using tips listed on the many Internet Photography Websites. You may specify the actual tips for each type of photography. A list of works cited should be attached to the five-page report. This should be hand-printed on notebook paper. Do not skip lines. Make your paper heartfelt and to the point for a passing grade.
Since Projects make up 60% of your grade in this class, I suggest you take the next assignment seriously. However, I am willing to offer you this alternative so that you might pass this course!
Next photo assignment
Your next group of photos is due Monday, Oct. 15th. You should take 35-40 nature shots. Practice using selective focus and full focus. You will make a contact sheet of 12 on Monday, and turn in your best two photos on Friday which illustrate shallow and deep depth-of-field.
Thursday, October 4, 2007
This week's assignments
This week we have discussed 35mm and Digital cameras. We went into detail about exposure and depth-of-field. These are ESSENTIAL topics in photography. Please see me if there is anything you don't understand. The following sites might help:
www.cs.mtu.edu/~shene/DigiCam/User-Guide/950/depth-of-field.html
http://www.cambridgeincolour.com/tutorials/depth-of-field.htm
http://www.dpreview.com/learn/?/Glossary/Optical/Depth_of_Field_01.htm
http://digital-photography-school.com/blog/learning-exposure-in-digital-photography/
http://www.forphotography.com/how-tos/perfect_exposure.html
We went outside to take depth-of-field shots and turned in a contact sheet.
We did some reading in both the 35mm and Digital books, and completed several worksheets that instructed you to label the parts of the cameras. You should have brought these worksheets to me to check so that you'll get credit for this classwork. You should keep them in your notes for the upcoming test on cameras.
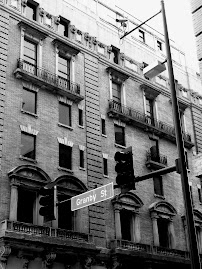
We edited our Architecture shots and turned in the best 5x7 JPG, along with a contact sheet of 12 photos.
If you are missing any of these assignments, please get them in as soon as possible. Late work receives a letter grade deduction---but PLEASE don't take a 'NHI'!!!
www.cs.mtu.edu/~shene/DigiCam/User-Guide/950/depth-of-field.html
http://www.cambridgeincolour.com/tutorials/depth-of-field.htm
http://www.dpreview.com/learn/?/Glossary/Optical/Depth_of_Field_01.htm
http://digital-photography-school.com/blog/learning-exposure-in-digital-photography/
http://www.forphotography.com/how-tos/perfect_exposure.html
We went outside to take depth-of-field shots and turned in a contact sheet.
We did some reading in both the 35mm and Digital books, and completed several worksheets that instructed you to label the parts of the cameras. You should have brought these worksheets to me to check so that you'll get credit for this classwork. You should keep them in your notes for the upcoming test on cameras.
We edited our Architecture shots and turned in the best 5x7 JPG, along with a contact sheet of 12 photos.
If you are missing any of these assignments, please get them in as soon as possible. Late work receives a letter grade deduction---but PLEASE don't take a 'NHI'!!!
Monday, October 1, 2007
spirit week assignment
All students are to take spirit week photos through the weekend. You will turn in a contact sheet of spirit week photos next Monday for your deadline grade. You will adjust the photos for brightness and contrast and correct any mistakes. You should fix red eyes!! Put 10 photos onto a word document with appropriate captions for each. This final assignment will be due next Friday.
Subscribe to:
Posts (Atom)


.jpg)