Anyone who is finished with all assignments, try this:
Go to PhotoShop Help>Welcome Screen>Tips and Tricks>Creative Photo Cropping
This is a tutorial on a really neat method of framing your photos!
Turn in for EXTRA CREDIT!!!
Wednesday, January 30, 2008
Tuesday, January 29, 2008
Animal Photography!
Your assignment for Monday, February 4th, is to photograph animals. It can be your pet, a neighbor's, or wildlife. Check out these links for examples of professional animal shots, and some tips to make your own pictures great:
http://www.desertusa.com/mag99/june/stories/animals.html
http://www.animal-photography.co.uk/
http://www.adobe.com/education/digkids/tips/photo/animals.html
http://www.allposters.com/-st/Animals-Photography-Posters_c58280_.htm
http://www.petsinpastel.com/photo.htm
http://photography.about.com/od/takingpictures/a/petphotography.htm
http://www.cowbelly.com/
http://www.photolinks.com/resources.html?p_page=petphoto.htm
TRY TO MAKE YOUR ANIMAL PHOTOS UNIQUE!!!
PhotoShop Techniques Test
As you are working in PhotoShop this week, you should be preparing for a test which will be given next week---probably Tuesday. This test will show whether you can do the 'basics' we have learned thus far. You should be able to do the following:
crop for the best shot
rotate a canvas
free transform
straighten a horizon
create a vignette
create a decorative frame
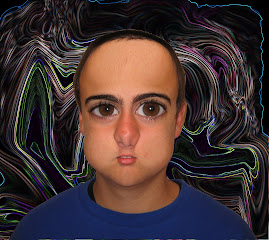
do simple facial retouching
create depth of field/selective focus
warm up or cool down a color cast
clone
merge elements of two photos
use burn, dodge, and saturate
adjust levels and brightness/contrast
use unsharp mask
work with layers
work with filters
change a color photo to black and white
work with opacity
and you should know the basic theories of composition.
If you are having difficulties with any of the above techniques, ask for help!
crop for the best shot
rotate a canvas
free transform
straighten a horizon
create a vignette
create a decorative frame
do simple facial retouching
create depth of field/selective focus
warm up or cool down a color cast
clone
merge elements of two photos
use burn, dodge, and saturate
adjust levels and brightness/contrast
use unsharp mask
work with layers
work with filters
change a color photo to black and white
work with opacity
and you should know the basic theories of composition.
If you are having difficulties with any of the above techniques, ask for help!
Monday, January 28, 2008
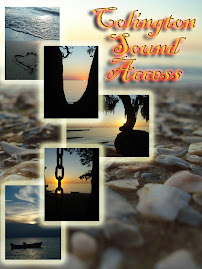
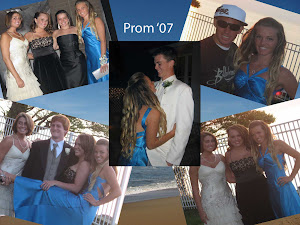
Photo Montage
You will have a photo montage due this Friday, Feb. 1st. Please get a printed direction sheet from me. Your montage is different from a collage!
Instructions:
Start a new background 8 inches by 10 inches at 300 PPI. It can be horizontal or vertical. You can use a photo, a pattern, or a color as your background.
Add other pictures as layers. Don’t forget to adjust levels and brightness and contrast on each individual photo. You should follow a theme or have one central idea that connects the photos. The photos do not have to be rectangular. They can be cut-outs, circles, or irregular in shape. However, do not cut objects out of the pictures. A montage differs from a collage in that you are using whole photos, not specific elements from your pictures.
Experiment with the lay-out. You may want some images to overlap each other, and some images to have less than 100% opacity. Experiment with different layer styles (Layer>>Layer Styles) or click on the little cursive 'f' icon in the layers box. You should use a similar treatment with each photo to give the piece unity.
Add text and experiment with both style and fonts. You should also incorporate your name into the piece. Points will be taken off if your name is added later.
When you are satisfied with your project, flatten the image and print it. You should also leave it electronically in the completed assignments folder, using your class identification number.
Wednesday, January 23, 2008
next project...
Metaphor Self-Portrait
Metaphor--
1) A figure of speech in which a word or phrase that ordinarily designates one thing is used to designate another, thus making an implicit comparison, as in “a sea of troubles” or “All the world’s a stage” (Shakespeare).
2) One thing conceived as representing another; a symbol: “Hollywood has always been an irresistible, prefabricated metaphor for the crass, the materialistic, the shallow, and the craven” (Neal Gabler).
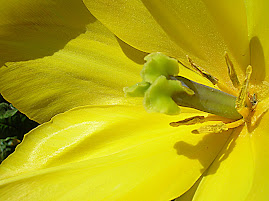
Still Life--Still life is the photography of small groups of objects, either found or put together for the purpose. It may simply be concerned with formal qualities (tones, textures, colours, shapes, form etc) or have a more metaphorical intent.
Check out these sites:http://www.shutterpoint.com/Photos-BrowseCat.cfm?cat_id=7
http://www.shutterbug.net/refreshercourse/lens_tips/1205back/
http://www.betterphoto.com/gallery/dynoGall2.asp?catID=17
Most of what you see here is considered ‘Still Life’ photography.
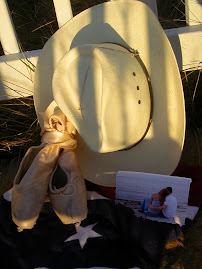
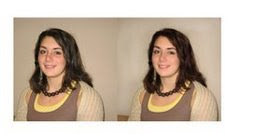
METAPHOR SELF-PORTRAIT PROJECT:
Read these instructions carefully. This photograph is about you. It is a portrait of you. The only thing different is that you are not in it. This picture is a still life, a metaphor that contains at least five things that represent who you are. Your friends should be able to look at it and recognize you in the picture. This picture should not contain any living things, only still objects. It should represent things you are passionate about. Pay special attention to lighting and arrangement of the items. Change them up and see what works best.
You will make a contact sheet with 12 DIFFERENT photos that represent YOU. Your Contact Sheet is due January 28th. Final is due January 30th at the end of class. Additionally, please write a one-page paper telling about the objects in your photo, and why this photo represents you.
Metaphor--
1) A figure of speech in which a word or phrase that ordinarily designates one thing is used to designate another, thus making an implicit comparison, as in “a sea of troubles” or “All the world’s a stage” (Shakespeare).
2) One thing conceived as representing another; a symbol: “Hollywood has always been an irresistible, prefabricated metaphor for the crass, the materialistic, the shallow, and the craven” (Neal Gabler).
Still Life--Still life is the photography of small groups of objects, either found or put together for the purpose. It may simply be concerned with formal qualities (tones, textures, colours, shapes, form etc) or have a more metaphorical intent.
Check out these sites:http://www.shutterpoint.com/Photos-BrowseCat.cfm?cat_id=7
http://www.shutterbug.net/refreshercourse/lens_tips/1205back/
http://www.betterphoto.com/gallery/dynoGall2.asp?catID=17
Most of what you see here is considered ‘Still Life’ photography.
METAPHOR SELF-PORTRAIT PROJECT:
Read these instructions carefully. This photograph is about you. It is a portrait of you. The only thing different is that you are not in it. This picture is a still life, a metaphor that contains at least five things that represent who you are. Your friends should be able to look at it and recognize you in the picture. This picture should not contain any living things, only still objects. It should represent things you are passionate about. Pay special attention to lighting and arrangement of the items. Change them up and see what works best.
You will make a contact sheet with 12 DIFFERENT photos that represent YOU. Your Contact Sheet is due January 28th. Final is due January 30th at the end of class. Additionally, please write a one-page paper telling about the objects in your photo, and why this photo represents you.
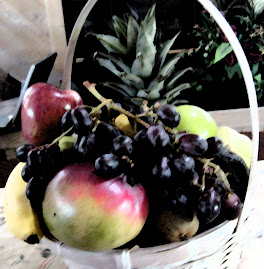
Food/Beverage Still Life
Your Food Still Life will be a 12-6-1 assignment, with one exception. You are to use a creative frame on the final photo as well as a creative filter. I want you to EXPERIMENT with several ways to frame your photo and several filters. Consult PhotoShop 'Help' for tips and techniques and tutorials. Also, play around with the 'styles' button in your layers window (it looks like a cursive 'f'). Each of your six edited photos should show me different techniques and filters you tried before settling on your best final photo.
Here are a few sites that might help with creative framing:
http://photoshopium.com/photo-effects/27/easy-way-to-make-photo-frames-in-photoshop
http://www.shutterfreaks.com/Actions/ACsAdvancedFrames.html
http://graphicssoft.about.com/od/photoshoptutorialsedgefx/Borders_Frames_and_Edge_Effects.htm
Here are a few sites that might help with creative framing:
http://photoshopium.com/photo-effects/27/easy-way-to-make-photo-frames-in-photoshop
http://www.shutterfreaks.com/Actions/ACsAdvancedFrames.html
http://graphicssoft.about.com/od/photoshoptutorialsedgefx/Borders_Frames_and_Edge_Effects.htm
Tuesday, January 15, 2008
Food/Beverage Still Life
Your next project is your choice of food or beverage in a still life set up. As always, take 35-40 shots using different points of view, arrangement, lighting, camera settings, etc. Contact sheet of 12 will be due on Jan. 23rd.
Wednesday, January 9, 2008
NHIs
I wanted to give you an opportunity to take care of any missing projects before report cards go out. Please keep in mind that I show NHI until ALL pieces of the project have been submitted. As of January 9th, I am showing the following NHIs:
Backlit (same close-up backlit shot with and without flash, side by side & contact sheet/12)--11,13,16,112,113,43,53,54,56,57,59,510,512
Before and After Portrait Retouch (contact sheet/12, 4 before shots side by side with the same 4 portraits after retouch):112,43,54,55,57,58,59,510,512
Macro (contact sheet/12, 6 edited, best final photo):112,114,43,51,512
Classwork Collage (collage combining several images--any subject):16,43,510
Family/Relationship Themed Collage (contact sheet/12, collage containing elements from at least four photos): 11,13,16,112,43,57,510
Theories of Composition Photo Shoot (classwork grade--contact sheet/12, 6 on Word doc. w/paragraph):16,43,55,56,57,510,512
Landscape (contact sheet/12, 6 edited, best one): 112, 55,57,510
People Collage (collage combining at least five portraits): 116,43,54,59
Catalog page (one photo demonstrating colorizing an article of clothing, with text): 43,58,510,512
Practice Hockney collage (contact sheet/24 b&w photos arranged on white printer paper: 43,510,512
Composition Research Paper: 55, 510
In an effort to raise the grades of some of you who have become very far behind, I will still accept any of the above NHIs until 5:00 p.m., Monday, January 14th. Your grade will, of course, reflect how late the project may be. Remember, projects make up 60% of your grade, and ANY NHIs hurt your grade badly in this class.
I have not yet graded Hockney (paper collage) or the Backlit Landscape (12/6/1), but you know whether or not you've turned those in. They will also be included on this report card.
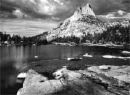
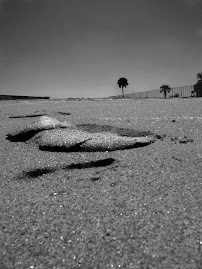
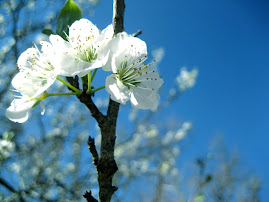
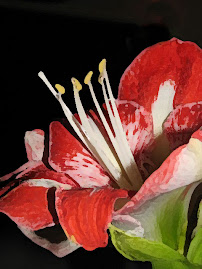
Still Life Photography
Check out the following sites:
http://webhome.idirect.com/~dpl/gallery1.html
http://www.betterphoto.com/gallery/dynoGall2.asp?cat=17
http://www.usefilm.com/photo_category/16/Pictures_of_Still_Life.html
http://www.apogeephoto.com/mag2-6/mag2-7winners.shtml
http://www.stilllifewith.com/2006/07/14/photo-contest-from-food-wine-magazine/
http://stilllifewith.com/2006/12/01/stw-challenge-for-december-tradition/
http://digitalmedia.oreilly.com/2004/09/15/food_photos.htmlhttp://www.markhemmings.com/MarkWebsite/food_photography/index.htm
http://dessertfirst.typepad.com/dessert_first/2006/05/food_photograph.html
Basic Principles of Still Life Photography:
Throughout the decades, artists have depicted still life scenes—arrangements of inanimate objects—in paintings and photography. Shooting still life subjects is one of the best ways to sharpen your photographic skills. You can take your time, and your subject remains stationary.
Good composition, framing and lighting are all very important to translate your still life into a great photo. Every day we are bombarded with still life images of appetizing foods, shiny housewares and other appealing products in magazine ads, brochures and catalogs. Professionals spend a great deal of time setting up these shots and you can learn a lot just by studying the photos you find most appealing and unique.
Notice how photographers use repeating shapes and lines to create patterns and use complimentary colors. Study the lighting that they use. Simplicity is very important when composing still lifes. You don’t need to collect a wide range of complicated objects to create an interesting picture. Instead, choose a few objects with a common thread.
The arrangement of a still life should begin with the positioning of a single dominant subject. Then add other objects one at a time, and examine the arrangement through your camera’s viewfinder. Experiment with your camera angle until the scene shows the elements in the most pleasing balance. Photograph the original grouping, and then rearrange or remove objects to see if it improves the composition.
Your next project will involve setting up a still life of specific objects and photographing it. To help prepare you, read the previously mentioned articles and find 6 still life photographs from the Internet that you particularly like. These photos should include only inanimate objects. Paste the 6 photos to a one-page word document (two columns) and write a short paragraph about each. Tell what techniques the photographer used that appeal to you. This will be due at the end of class Friday, January 11th. Turn in a hard copy, and leave a copy in the shared folder.
Over the weekend, take still life photographs of any subject---your choice! We are going for BEAUTY! Experiment with the arrangement and lighting. You should use a minimum of five inanimate objects. Take some photos with flash and some without. Be creative! Think about the elements of composition we have just studied. Be prepared to work with your photos Monday, January 14th. A contact sheet of 12 will be due at this time. If you do not have your photos Monday, you will be writing a paper on still life photography while the rest of us work in PhotoShop. The 6 edited and best 5x7 are due at the end of class Tuesday, January 15th. The alternative assignment, a 3-page paper on Photographic Still Life, is due then as well. We will move on to the next topic the following week. Unless you are absent Tuesday, you are expected to have this project completed then.
Thursday, January 3, 2008
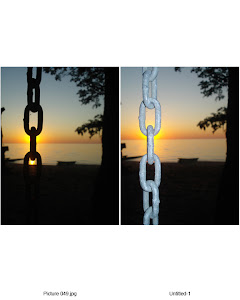
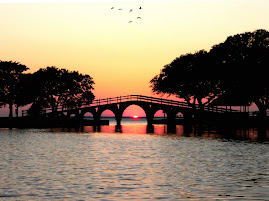
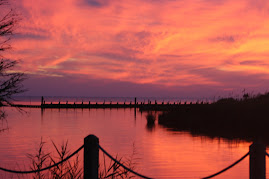
Next Picture-Taking Assignment
Remember the Backlit Photos we took LAST YEAR??? Now you will take a backlit landscape. Go for beauty! Any sunrise or sunset would qualify. Watch your lens flares! Contact sheet of 12 is due Monday, January 7th.
Welcome Back!!
It was tough to get out on this COLD morning, wasn't it??? Today is your last opportunity to submit a photo for consideration for the upcoming art show. We will vote tomorrow to decide which ones get printed, matted, and will go to the show!
Your contact sheet/12 Hockney photos is due today. Also, please print a black and white contact sheet of 24. Cut these photos out and arrange into a practice collage on plain white paper. You must have my approval on this prior to beginning your final project on 18"x24" newsprint paper. Your practice collage will be graded, and is due by the end of class today. Final will be due next week. Before beginning final project, open each photo, adjust levels, brightness/contrast, and crop if necessary. Each small photo should look good on its own!
If you need to refresh your memory about Hockney, do so following the links in the previous posts.
Subscribe to:
Posts (Atom)

.jpg)