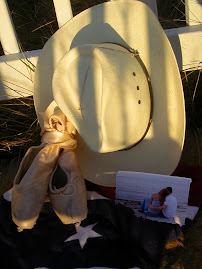
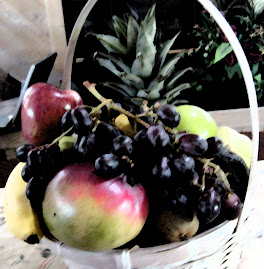
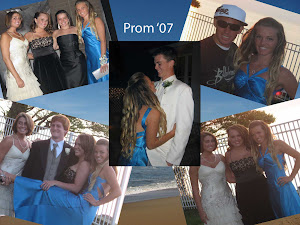
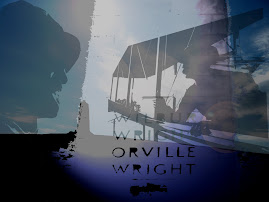
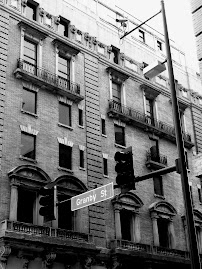
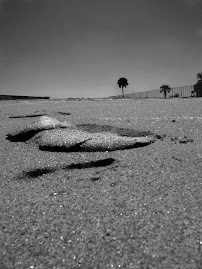
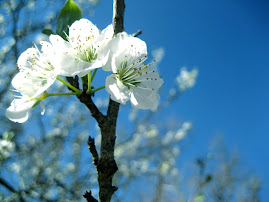
Congratulations to the following students who won People's Choice awards at the Gardening Festival Art Show. I am told that approximately 80 visitors voted for:
1st place---Casey Sloate
2nd place---Drew Keenan
3rd place---Barry Lawler
I am proud to say that all three are students of my Photography I classes!! GREAT JOB!!
Tuesday, June 3, 2008
Friday, May 30, 2008
NHIs---Last Chance!!
I have officially closed the late folder for NHIs, but I will allow you to submit any project you have already completed, but did not get turned in correctly. You DO NOT have time to do any project start to finish at this late date. However, if your copy is in your folder, please submit it to the late folder for one last chance to get rid of NHIs. I will check the late folder for the last time on Friday, May 30th, 3:30 p.m. You MUST turn in all pieces of a project to get credit!
Thursday, May 29, 2008
EXAM EXEMPTIONS
Based upon preliminary figures, and your tardies and absences to date, the following first period students are exempt:
14, 18, 110, 114
fourth period:
45, 46, 47, 48
fifth period:
511
THIS LIST IS SUBJECT TO VERIFICATION WITH ADMINISTRATION AS TO ATTENDANCE/TARDIES, UNEXCUSED ABSENCES. IT MAY CHANGE! FINAL LIST WILL BE PUBLISHED FRIDAY, MAY 30TH, 3:30P.M.
14, 18, 110, 114
fourth period:
45, 46, 47, 48
fifth period:
511
THIS LIST IS SUBJECT TO VERIFICATION WITH ADMINISTRATION AS TO ATTENDANCE/TARDIES, UNEXCUSED ABSENCES. IT MAY CHANGE! FINAL LIST WILL BE PUBLISHED FRIDAY, MAY 30TH, 3:30P.M.
Wednesday, May 28, 2008
Study for Exams!
Here's a list of things you should know for exams:
Know about the photographer you presented to the class.
Know about at least one other photographer we studied (from reading, films, or other presentations).
Know the basics about 35mm photography.
Know how to get the proper exposure.
Know about action photography and how to get blurred action and stopped action shots.
Know about composition. Read over your research paper on the topic!
Read over your career research paper.
Know when and when NOT to use the 'automatic' setting on your camera.Read over our early worksheets and hand-outs.
Know PhotoShop! Know where to find all the tools. Go over the PhotoShop handouts if you are unsure.
Understand terms like Bits, Bytes, Pixels, dpi, ppi, Histogram, Hue/Saturation, Noise, Resolution, RGB, JPEG, Exposure, F-Stop, Aperture, Point-of-View, Composition, Shutter Speed, Exposure, Dodge, Burn, Redeye, etc.
As you know, we do not have textbooks that go home with students. If you have any questions about the above topics, please look them up in class or ask! I should have a list of potential exam exemptions by Friday.
Friday, May 23, 2008
NHIs---VERY IMPORTANT!!!
THE LAST DAY I WILL ACCEPT LATE WORK WILL BE WEDNESDAY, MAY 28TH---WITHOUT EXCEPTION! AFTER THIS, NHIs WILL BECOME A ZERO. WITH PROJECTS COUNTING 60% IN THIS CLASS, YOU CAN NOT PASS THE COURSE WITH A LOT OF NHIs. THIS WEEKEND WILL BE YOUR LAST CHANCE TO TAKE MISSING PHOTOS. PLEASE PLAN ON STAYING AFTER SCHOOL TO WORK IN PHOTOSHOP. ALL LATE WORK SHOULD BE LEFT IN THE LATE FOLDER. MAKE SURE YOU LEAVE ALL PIECES, EVEN IF YOU HAVE ALREADY LEFT A PIECE OF THE PROJECT PREVIOUSLY. A PROJECT IS NOT COMPLETE UNTIL ALL PIECES ARE TURNED IN TOGETHER!! MAKE CERTAIN YOU PUT YOUR ID# FIRST IN THE TITLE OF THE PROJECT TO GET PROPER CREDIT FOR YOUR WORK!
Wednesday, May 14, 2008
Final Portfolio Presentations
You final portfolio should be finished by Friday. Monday, May 19th, we will begin presentations. Leave your PowerPoint in your own folder to pull up from my computer on the big screen. Do not set it on a timer! You should have to click to bring up each page since we may have questions. Be prepared to tell us a little something about each assignment, and each picture. Make sure your pictures are in order! Each individual photographic assignment (group of three photos) will be graded as follows:
Zero-Not submitted or Does not meet criteria of assignment
3.5-Below average; Shows minimal effort and lack of pride in finished product; Shows little creativity or technical skill
4-Average; Adequate interpretation of assignment, but could have been improved with more effort; Shows average level of creativity and technical skill
5-Above average; Shows high degree of imagination, effort and technical skill; Went beyond assignment’s requirements with pride in finished product
When I add it all up, I'll have your final grade. It will count as a double project grade. PLEASE give me your best effort!! We will critique each photo as you present your portfolio. This will also serve as a review for the exam as we discuss the elements of composition.
Tuesday, May 6, 2008
Interims
Please have interims signed by parents and return by Friday. Failure to do so will result in a telephone call from me to your parents to make sure they are aware of your progress in this class. Remember, with 60% of your grade coming from the projects you do in Photography I, any NHI in this class hurts. You can still turn work in to the late folder!
Monday, May 5, 2008
FINAL PORTFOLIO PROJECT!!!
DIGITAL PHOTOGRAPHY I
FINAL PORTFOLIO PROJECT
Due Date: May 16, 2008
Format: PowerPoint
Assignment: Students will produce a 42 slide PowerPoint presentation highlighting their best work in Digital Photography I. It will include a title slide and a final slide containing an honor statement. The following ‘best’ photos will take up an entire slide:
Architecture or Architectural Detail—man-made, permanent structure
Landscape, Student’s choice (“calendar shot”—the goal is beauty)
Black and White of Student’s choice
Macro photo
Nature shot
Candid photo of school life
Posed Portrait, retouched as necessary
Student’s best collage
A Montage
Photo which shows action/movement
Backlit close-up photo (with or without flash, or both to show contrast)
Backlit Landscape
Family/Relationship-themed collage
Unique photo showing creativity—student’s choice of subject matter
Still Life photo of food/beverage
Student’s choice of photo showing use of a creative filter
A Vignette
Metaphor Self-Portrait Still Life (not a collage!)
Field Trip photo (Wright Memorial or Butterfly Garden)
Created artwork showing student’s best use of PhotoShop tools on a photo/photos---NOT the ‘paint’ project
A separate slide will appear before each ‘best’ photograph. It will contain at least two other images of the same subject matter you considered before deciding on your best photograph, which will immediately follow. This slide will include the title of the project, explain the criteria of the assignment, tell how your photographs fit these criteria, and tell any interesting facts about the photos, or the process of taking them or editing which might not be obvious to the naked eye. Title and end slide should show similar design features. End slide will contain the honor code stipulating that you took all photos personally during this school year. Use transitions and animation on your slides, but do not automate your slide show.
Note: A PhotoShop canvas size of 10 inches wide by 7.5 inches high is the equivalent of a PowerPoint slide. The two slides for each individual selection will be graded on effort, creativity, imagination, and technical skill. Do not submit photos with serious photographic errors such as red eyes, out-of-focus, underexposed or overexposed, crooked lines, etc. Put slides in order! Make sure your text is an enhancement to your overall project, not a distraction! You will give an oral presentation with your slide show. Be prepared to elaborate on how you created each piece and answer questions. Use of ANY image that you did not personally photograph will result in a zero.
Monday, April 28, 2008
Beach Project
You should turn in your contact sheet of 12 beach or sound shots today. You may use any filters or special effects you like on this project, including combining photos. Make them really special! Six edited shots and your final are due Thursday.
PLEASE BRING CAMERAS TUESDAY, WEDNESDAY, AND THURSDAY. Hopefully we will get to take a short trip to the beach for a few more pics!
PLEASE BRING CAMERAS TUESDAY, WEDNESDAY, AND THURSDAY. Hopefully we will get to take a short trip to the beach for a few more pics!
Thursday, April 24, 2008
Photo Contest!!
Photo Contest - North Carolina State University's Climate Office is
sponsoring a 'Young Weather Photographers' contest for students between the
ages of 7-16. The deadline to submit a photo is June 30. Contest details
are available online at
http://www.nc-climate.ncsu.edu/education/contest.php.
Questions may be
directed to Shannon Futrell at safutrel@ncsu.edu.
sponsoring a 'Young Weather Photographers' contest for students between the
ages of 7-16. The deadline to submit a photo is June 30. Contest details
are available online at
http://www.nc-climate.ncsu.edu/education/contest.php.
Questions may be
directed to Shannon Futrell at safutrel@ncsu.edu.
Wednesday, April 23, 2008
Weekend assignment
...is to take photos of the beach or sound. You should have a mixture of seascapes and close-ups. A contact sheet of 12 is due Monday.
Monday, April 21, 2008
This week's classwork---work on faces
We will be taking pictures of everyone in the class and experimenting with different techniques in PhotoShop using these photos. Start a folder entitled (your identification number) and "faces". By the end of the week, you'll have 12 pictures to put on a contact sheet and turn in. This will count as a project grade.
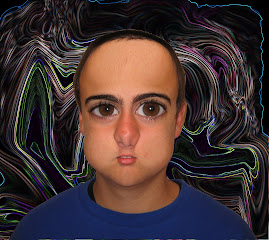
On Monday, we made two backgrounds by using Liquify on random photos. We also used Liquify to make four silly faces. On Tuesday, we explored the asymmetrical nature of our own faces by putting two left halves together and two right halves together. All the faces should be placed on the two liquified backgrounds we made. Beginning on Wednesday, you will work on creating six "new" people by combining the features of your classmates. You should clean them up and make them convincing. Each of the 12 faces you have created should be placed on a background. On Friday, you'll make a contact sheet to turn in for a project grade.
On Monday, we made two backgrounds by using Liquify on random photos. We also used Liquify to make four silly faces. On Tuesday, we explored the asymmetrical nature of our own faces by putting two left halves together and two right halves together. All the faces should be placed on the two liquified backgrounds we made. Beginning on Wednesday, you will work on creating six "new" people by combining the features of your classmates. You should clean them up and make them convincing. Each of the 12 faces you have created should be placed on a background. On Friday, you'll make a contact sheet to turn in for a project grade.
Friday, April 18, 2008
Candid School Shots.....and Beach Project
Very soon we will be putting together our final portfolio project. The one area I think you may be lacking is CANDID school shots (meaning the subject did not know you were taking the picture) from either classes, hallways, or outside school functions. Please be taking lots of photos that fit this description----NOT your friends mugging for the camera!!
I'd like us to do a Beach Project. I have seen A LOT of beach photos, and you'll have to take some really special pictures to impress me and earn an 'A' (or do some very creative editing)! Going up to the boardwalk or leaning out of the car window is not going to cut it! If you go to the beach this weekend, get some good shots. I won't assign it for a deadline grade, but you should all try to get to the beach (or sound) for photos within the next week. Perhaps we can all go as a field trip????? I'll see if I can work that out!
I'd like us to do a Beach Project. I have seen A LOT of beach photos, and you'll have to take some really special pictures to impress me and earn an 'A' (or do some very creative editing)! Going up to the boardwalk or leaning out of the car window is not going to cut it! If you go to the beach this weekend, get some good shots. I won't assign it for a deadline grade, but you should all try to get to the beach (or sound) for photos within the next week. Perhaps we can all go as a field trip????? I'll see if I can work that out!
Wednesday, April 16, 2008
Cameras!
Bring your cameras to class for the rest of the week. I'd like to plan a field trip when the weather permits. I have a fun activity for us to do!
Monday, April 14, 2008
Song Lyric Project
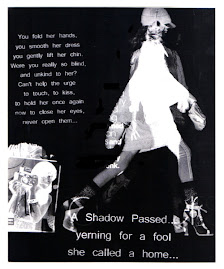
As we discussed last week, you were to have photos that illustrate song lyrics or a poem for today. You will submit a contact sheet of 12. For this project you may use just one photo or a collage or montage. You may use the entire song or poem, or just the lines that apply. Please use creative text! No restrictions on filters, borders, etc. Those of you who are particularly imaginative should really shine on this project! The final piece will be due on April 18th.
Monday, April 7, 2008
This week's assignments...and grades!
Your travel brochure is due on Tuesday. We will print them all and you will be assigned one brochure to critique in writing on Friday. This will count as a test grade. Brush up on your composition terminology.
When you have finished your brochure, begin working on the tutorial of your choice for www.worth1000.com . There are some really great things there to choose from. I will grade this like a project, so do a nice job. This will be due on Friday. I will take into account the difficulty level of the tutorial you choose when I grade them. This will be your first grade of the last grading period!
For next week, be thinking of a poem, story, or song lyrics you can illustrate with photography. Your photos will be due on Monday, April 14th---your first deadline grade of the last grading period. You'll put the text together with your best photo (or combination of images) and make a poster! Final poster will be due April 18th.
Some of you really need to concentrate on getting your grades up. Make sure to meet your deadlines! Although it's only a small percentage of your final grade, it can make a big difference if you're constantly late. A single deadline grade can bring your score for the grading period down a point or two. A row of deadline zeroes can bring you down a letter grade or more! Same with participation grades----Make sure you're on task! Make good use of your class time. If you have completed the current project, work ahead or spend your time practicing in PhotoShop. That will always be considered 'on task'---even if you're just goofing off making silly pictures. You are learning by doing!
Tuesday, April 1, 2008
Weekend assignment
...take more photos for your 6-panel brochure! If you feel that you have enough, go with what you've got. If you need more, that's your assignment. Remember, I am giving you more time on this project than most, and it's going to be counted heavier in your final grade than other projects. Make sure yours shines for a good grade!
Monday, March 31, 2008
NHIs
I would suggest that each of you go back through the entries on this web page to make sure you have done all the projects. If you are missing anything, TURN IT IN to the late folder! You do not want to have NHIs in this class! I will take late work until April 2nd, 5:00 p.m. After that, I HAVE to close out grades for this report period.
If we find that you have completed a project but it was not saved correctly, or for some other reason I am showing NHI by mistake, you absolutely WILL be given the opportunity to re-submit your copy before grades go out. However, you will NOT have additional time to do a late project start to finish.
If we find that you have completed a project but it was not saved correctly, or for some other reason I am showing NHI by mistake, you absolutely WILL be given the opportunity to re-submit your copy before grades go out. However, you will NOT have additional time to do a late project start to finish.
Travel Brochure Project
Your Travel Brochure will be due at the end of class on Tuesday, April 8th. This is a bigger than usual project and it will count 1 1/2 times a normal project. You will be graded on overall final appearance, technical skill (degree of difficulty will be taken into consideration if you try a new technique!), and effort put forth.
Go to 'Publisher' and find an appropriate template for your brochure. As you plan its layout, make a 'mock-up' sketch using pencil and paper. Show where each photo will go, and what text you'll use and where. You must get your 'mock-up' approved before you proceed. A project without the 'mock-up' will lose a letter grade.
You will use a minimum of ten photos in your Travel Brochure. Of course, each photo should be cleaned up in PhotoShop. This would be a good place for decorative borders! You may want to combine images into a collage. Layout is important. It should be neat and attractive to the eye.
You should use text in your brochure. Try some of the techniques you have just learned! Rather than simply giving each photo a caption, give some details about the significance of what is pictured. You may use the Internet to check your facts or for additional information. Think about the fun activities in the area. Give descriptions to entice the reader. Talk about food or lodging or shopping. Give specific addresses when appropriate.
You should create this brochure as a sales tool to attract visitors who are not familiar with the location. Make your brochure SPARKLE! For samples, see www.goanywhere.info .
When you are finished, print the brochure out in color. Leave it electronically with your ID number in the Completed Assignments folder. Turn in the hard copy, together with your 'mock-up' page.
Wednesday, March 19, 2008
Spring Break photos
...should be locational photos for a travel brochure. If you're going out of town, you can use pictures from that location. Just make CERTAIN you have enough!! You need close-ups and distance shots, colorful ones and subtle, shots with people and without. A contact sheet of 12 is due when we come back, but you need many, many more than that!
Line Art
This week we are doing 'line art' with photos. I have given you a hand-out with all instructions. Please follow them step-by-step. This should help you develop technical reading skills! I will give you the image of the tricycle for the fist picture. Then you'll do two of your own pictures. You should paste the three to a 8x10 canvas. Arrange it in an attractive manner. AdD your name, date, and project 'Line Art'. This is due on Friday, March 21st. I'd also like to go outside again this week, and do a critique, and we'll need to work on the art show, so please don't put this off until the last minute! This will be given a full project grade.
Wednesday, March 12, 2008
our next picture taking assignment...
...will involve great things about the OBX. Use your imagination!! Twelve great shots due on Monday, March 17th.
Product Advertisement
On Monday, you should have turned in a contact sheet of 12 photos to be used in a product advertisement. The item you are advertising is your choice! It can be a surfboard, skateboard, soap, shampoo, clothing, etc. View professional ads in magazines to give you ideas. Lay out a minimum of four ideas. Turn these in on a contact sheet by Friday. Choose the best one for grading and submit as 5x7 JPEG on the 14th. Use the creative text!
...it's been a long time...
...since I've been able to get into Blogspot. I hope you have been using the FFHS site (follow the Fine Arts link) to stay informed while Blogspot was down. I will attempt to 'catch up' this site.
You have been experimenting with creative text in PhotoShop. Here is a copy of the handout:
EXPERIMENTING WITH TEXT
Begin with the basics:
http://video.about.com/graphicssoft/Wrap-Text-Effect-in-Photoshop.htm
or http://www.about.com >Graphics Software>Wrap Text Effect in Photoshop
http://video.about.com/graphicssoft/REFLECTION-TEXT-IN-PHOTOSHOP.htm#
or Adobe PhotoShop Text Reflection Effect (also at about.com)
http://video.about.com/graphicssoft/FIRE-TEXT-EFFECT-IN-PHOTOSHOP.htm
or Adobe PhotoShop Fire Text (about.com)
Then try the following tutorials:
1)Go to PhotoShop ‘Help’ button. Select ‘Welcome Screen’>Tips and Tricks>Creating Metallic Type
2)PhotoShop ‘Help’>’Welcome Screen’>Tips and Tricks>Lightblast!
Next try this:
http://www.worth1000.com/tutorial.asp?sid=161027&page=1
or http://www.worth1000.com ‘Using Vector Designs and Customizing Text in PhotoShop’
Do Exploding Text from the printed instruction sheet
Finally, select three techniques to try from this site:
http://www.photoshoproadmap.com/Photoshop-blog/2007/07/22/the-best-80-photoshop-text-effects-on-the-web/
or The PhotoShop Roadmap>’The best 80 PhotoShop text effects on the web’
or http://www.tutorialwiz.com/tutorials/text_effects/1.html (Tutorial Wiz>Text effects)
If you follow all the examples I have listed here, you should have tried at least 10 different techniques. You are required to try six and turn in on a contact sheet. Choose your best FOUR for grading. This project is due today, March 12th.
See next post for instructions on the Product Advertisement also due this week.
Tuesday, March 4, 2008
Back in Business!
Finally able to get back to Blogspot! I hope you have been keeping up with your assignments by visiting the FFHS page while it was down. As you know, we are doing our Nature Project. You were to have 12 photos on a contact sheet Monday, March 3rd. To help you along, I am planning field trips for all classes. Make sure you bring your camera each day so you're prepared!
This week's class time will be spent editing photos (12-6-1 project) and creating either a collage or montage with nature as the theme.
We will also work with creative techniques for text this week. We'll use some of these ideas in our next project---Product Advertisement. For Monday, you should take 35-40 photos of the item you'd like use to design an ad.
Monday, February 25, 2008
Student Choice Black and White...and sub assignments
Once again, I'm looking for something really special! This is a 12-6-1 assignment, with 12 on a contact sheet due on Monday, and 6 edited on a contact sheet and best 5x7 JPEG due on Wednesday.
While you have a sub, you will also have an exercise on blending images. The sub will give you two images to work on, and then you'll repeat the process using two of your own photos. Leave all completed work in the shared folder.
While you have a sub, you will also have an exercise on blending images. The sub will give you two images to work on, and then you'll repeat the process using two of your own photos. Leave all completed work in the shared folder.
Monday, February 18, 2008
Student Choice (Color) Photo
I trust this is one assignment you can all turn in for 100 for the deadline grade! Make a contact sheet of 12 of your best photos---any subject. I am looking for NEW photos I have not seen before! Since I left this one open for you to use your full creativity, I am expecting something really special from each of you! To get an 'A' on this one, you're going to have to impress me. You may use any technique or filter you wish. Make sure you create a frame. Turn in six edited pictures on a contact sheet, and your best 5x7 JPEG. Contact sheet of 12 is due Tuesday, with final project due Wednesday.
Thursday, February 14, 2008
Substitute Friday
By now I guess you realize you will have a substitute teacher on Friday. I expect you to behave like the mature students I know you can be for the sub. I have instructed her to write up anyone who gives her trouble. You will be finishing up your Careers paper and your Action Project. Any questions you might have can be answered simply by reading this web page! On Tuesday, you should be prepared with your "Student Choice" (Color) photos. See you then.........
Wednesday, February 13, 2008
Don't procrastinate!!
We will be watching a film on Thursday to go with your Photographic Careers paper. It is about a number of photographers who have won the Pulitzer Prize. You should really enjoy it. There's a lot of action! Anyway, don't put off working on the projects you have due this week! You'll have today (Wednesday) and Friday ONLY to finish your Action Project and the 3-page research paper. Don't forget the Action Project is a 12-6-FOUR project. Read the post here on the web site for details if you're confused!
Tuesday, February 12, 2008
NEXT ASSIGNMENT----
STUDENT CHOICE (COLOR)--Freestyle!! I'm giving you the freedom to use your full imagination and creative skills! Your photo will be graded against 40 others. Make sure it "wows" me! 12-6-1
Monday, February 11, 2008
Career Paper
You have a research paper due Friday, February 15th. You will research and write a three page paper on 'Careers in Photography'. Students should discuss at length at least three very specific career choices that utilize photographic skills. You should describe exactly what is involved, skills other than photographic which would be necessary, required education, locations where the job could be readily obtained, pros and cons of the profession, salary to be expected, difficulties to overcome, etc. Make the paper personal! Tell what YOU would enjoy about the career choices. It should be written in your own words, typed, and double-spaced. All reference material should be cited on a fourth page. At the end of class on Friday, we will print the papers and hand them in. They will be graded like a project. Do a good job!
Tuesday, February 5, 2008
Action/Sports Photography
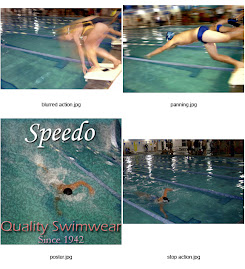
Our next photo shoot will involve sports photography. You should take action photos---stop action, blurred action, and panning. Please take LOTS of pictures (minimum 35-40). Many of them will not come out! You should have several of each type by MONDAY, FEBRUARY 11TH, DEADLINE FOR CONTACT SHEETS. You'll make a contact sheet showing 4 photos of each type---12 total.
The final project will be to turn in the best edited 'freeze action', best edited 'blurred action', and best edited 'panning' shots, as well as a sports shot using text to make a poster. You will place the four photos on one sheet. This page will be due at the end of class on Thursday,
FEBRUARY 14TH. Save the sheet containing all four final photos to the shared folder on the 'N'.
Print the page to 'media center color', and turn in the hard copy. THE LAST DAY THIS PROJECT WILL BE ACCEPTED LATE, WITH A LETTER GRADE DEDUCTION, WILL BE FEBRUARY 21ST. Here are some sites to help you better understand what makes a good action shot.
Professional Photographers who specialize in Action Photography:
http://www.padulaphotography.com/
http://www.actionsportsinc.com/eventdisplay.aspx?is=9
http://www.actionathletics.com/
http://www.actionsportsphotography.sasktelwebsite.net/
http://www.actionsportspress.com/http://www.greggriess.com/action_main.htm
‘How to’ Sites:
http://photo.net/learn/sports/overview
http://www.popphoto.com/popularphotographyfeatures/4016/how-to-photograph-baseball-and-softball.html
http://www.nyip.com/ezine/sports/golf.htmlhttp://www.squidoo.com/action-photography/
http://www.nyip.com/ezine/sports/football.html
http://www.popphoto.com/popularphotographyfeatures/4334/how-to-show-an-action-sequence.html
http://www.schoolofphotography.com/if/infocus22.html
Required Reading:
http://www.diynetwork.com/diy/shows_dtwp/episode/0,2499,DIY_23301_40578,00.html
http://www.diynetwork.com/diy/hp_digital_photography/article/0,2033,DIY_13956_4228109,00.html
http://www.diynetwork.com/diy/hp_techniques/article/0,2033,DIY_13958_2270940,00.html
http://www.diynetwork.com/diy/hp_digital_photography/article/0,2033,DIY_13956_4228109,00.html
http://www.diynetwork.com/diy/hp_digital_photography/article/0,2033,DIY_13956_4228155,00.html
Monday, February 4, 2008
Test tomorrow
You'll start your two-part PhotoShop test tomorrow, Tuesday, February 5th. Because Wednesday is a short day, you'll get the second half on Thursday, February 7th. Please go over the study guide to make sure your skills are sharp!
Animal Project
Hope you all have your animal shots today. You will make a contact sheet of 12, develop 6 into final-project quality for a second contact sheet, and pick the best 5x7 JPEG. In addition, you will make your choice of collage or montage using a minimum of 4 images. Completed project---4 pieces---will be due Friday, Feb. 8th.
Wednesday, January 30, 2008
All caught up????
Anyone who is finished with all assignments, try this:
Go to PhotoShop Help>Welcome Screen>Tips and Tricks>Creative Photo Cropping
This is a tutorial on a really neat method of framing your photos!
Turn in for EXTRA CREDIT!!!
Go to PhotoShop Help>Welcome Screen>Tips and Tricks>Creative Photo Cropping
This is a tutorial on a really neat method of framing your photos!
Turn in for EXTRA CREDIT!!!
Tuesday, January 29, 2008
Animal Photography!
Your assignment for Monday, February 4th, is to photograph animals. It can be your pet, a neighbor's, or wildlife. Check out these links for examples of professional animal shots, and some tips to make your own pictures great:
http://www.desertusa.com/mag99/june/stories/animals.html
http://www.animal-photography.co.uk/
http://www.adobe.com/education/digkids/tips/photo/animals.html
http://www.allposters.com/-st/Animals-Photography-Posters_c58280_.htm
http://www.petsinpastel.com/photo.htm
http://photography.about.com/od/takingpictures/a/petphotography.htm
http://www.cowbelly.com/
http://www.photolinks.com/resources.html?p_page=petphoto.htm
TRY TO MAKE YOUR ANIMAL PHOTOS UNIQUE!!!
PhotoShop Techniques Test
As you are working in PhotoShop this week, you should be preparing for a test which will be given next week---probably Tuesday. This test will show whether you can do the 'basics' we have learned thus far. You should be able to do the following:
crop for the best shot
rotate a canvas
free transform
straighten a horizon
create a vignette
create a decorative frame
do simple facial retouching
create depth of field/selective focus
warm up or cool down a color cast
clone
merge elements of two photos
use burn, dodge, and saturate
adjust levels and brightness/contrast
use unsharp mask
work with layers
work with filters
change a color photo to black and white
work with opacity
and you should know the basic theories of composition.
If you are having difficulties with any of the above techniques, ask for help!
Monday, January 28, 2008
Photo Montage
You will have a photo montage due this Friday, Feb. 1st. Please get a printed direction sheet from me. Your montage is different from a collage!
Instructions:
Start a new background 8 inches by 10 inches at 300 PPI. It can be horizontal or vertical. You can use a photo, a pattern, or a color as your background.
Add other pictures as layers. Don’t forget to adjust levels and brightness and contrast on each individual photo. You should follow a theme or have one central idea that connects the photos. The photos do not have to be rectangular. They can be cut-outs, circles, or irregular in shape. However, do not cut objects out of the pictures. A montage differs from a collage in that you are using whole photos, not specific elements from your pictures.
Experiment with the lay-out. You may want some images to overlap each other, and some images to have less than 100% opacity. Experiment with different layer styles (Layer>>Layer Styles) or click on the little cursive 'f' icon in the layers box. You should use a similar treatment with each photo to give the piece unity.
Add text and experiment with both style and fonts. You should also incorporate your name into the piece. Points will be taken off if your name is added later.
When you are satisfied with your project, flatten the image and print it. You should also leave it electronically in the completed assignments folder, using your class identification number.
Wednesday, January 23, 2008
next project...
Metaphor Self-Portrait
Metaphor--
1) A figure of speech in which a word or phrase that ordinarily designates one thing is used to designate another, thus making an implicit comparison, as in “a sea of troubles” or “All the world’s a stage” (Shakespeare).
2) One thing conceived as representing another; a symbol: “Hollywood has always been an irresistible, prefabricated metaphor for the crass, the materialistic, the shallow, and the craven” (Neal Gabler).
Still Life--Still life is the photography of small groups of objects, either found or put together for the purpose. It may simply be concerned with formal qualities (tones, textures, colours, shapes, form etc) or have a more metaphorical intent.
Check out these sites:http://www.shutterpoint.com/Photos-BrowseCat.cfm?cat_id=7
http://www.shutterbug.net/refreshercourse/lens_tips/1205back/
http://www.betterphoto.com/gallery/dynoGall2.asp?catID=17
Most of what you see here is considered ‘Still Life’ photography.
METAPHOR SELF-PORTRAIT PROJECT:
Read these instructions carefully. This photograph is about you. It is a portrait of you. The only thing different is that you are not in it. This picture is a still life, a metaphor that contains at least five things that represent who you are. Your friends should be able to look at it and recognize you in the picture. This picture should not contain any living things, only still objects. It should represent things you are passionate about. Pay special attention to lighting and arrangement of the items. Change them up and see what works best.
You will make a contact sheet with 12 DIFFERENT photos that represent YOU. Your Contact Sheet is due January 28th. Final is due January 30th at the end of class. Additionally, please write a one-page paper telling about the objects in your photo, and why this photo represents you.
Food/Beverage Still Life
Your Food Still Life will be a 12-6-1 assignment, with one exception. You are to use a creative frame on the final photo as well as a creative filter. I want you to EXPERIMENT with several ways to frame your photo and several filters. Consult PhotoShop 'Help' for tips and techniques and tutorials. Also, play around with the 'styles' button in your layers window (it looks like a cursive 'f'). Each of your six edited photos should show me different techniques and filters you tried before settling on your best final photo.
Here are a few sites that might help with creative framing:
http://photoshopium.com/photo-effects/27/easy-way-to-make-photo-frames-in-photoshop
http://www.shutterfreaks.com/Actions/ACsAdvancedFrames.html
http://graphicssoft.about.com/od/photoshoptutorialsedgefx/Borders_Frames_and_Edge_Effects.htm
Here are a few sites that might help with creative framing:
http://photoshopium.com/photo-effects/27/easy-way-to-make-photo-frames-in-photoshop
http://www.shutterfreaks.com/Actions/ACsAdvancedFrames.html
http://graphicssoft.about.com/od/photoshoptutorialsedgefx/Borders_Frames_and_Edge_Effects.htm
Tuesday, January 15, 2008
Food/Beverage Still Life
Your next project is your choice of food or beverage in a still life set up. As always, take 35-40 shots using different points of view, arrangement, lighting, camera settings, etc. Contact sheet of 12 will be due on Jan. 23rd.
Wednesday, January 9, 2008
NHIs
I wanted to give you an opportunity to take care of any missing projects before report cards go out. Please keep in mind that I show NHI until ALL pieces of the project have been submitted. As of January 9th, I am showing the following NHIs:
Backlit (same close-up backlit shot with and without flash, side by side & contact sheet/12)--11,13,16,112,113,43,53,54,56,57,59,510,512
Before and After Portrait Retouch (contact sheet/12, 4 before shots side by side with the same 4 portraits after retouch):112,43,54,55,57,58,59,510,512
Macro (contact sheet/12, 6 edited, best final photo):112,114,43,51,512
Classwork Collage (collage combining several images--any subject):16,43,510
Family/Relationship Themed Collage (contact sheet/12, collage containing elements from at least four photos): 11,13,16,112,43,57,510
Theories of Composition Photo Shoot (classwork grade--contact sheet/12, 6 on Word doc. w/paragraph):16,43,55,56,57,510,512
Landscape (contact sheet/12, 6 edited, best one): 112, 55,57,510
People Collage (collage combining at least five portraits): 116,43,54,59
Catalog page (one photo demonstrating colorizing an article of clothing, with text): 43,58,510,512
Practice Hockney collage (contact sheet/24 b&w photos arranged on white printer paper: 43,510,512
Composition Research Paper: 55, 510
In an effort to raise the grades of some of you who have become very far behind, I will still accept any of the above NHIs until 5:00 p.m., Monday, January 14th. Your grade will, of course, reflect how late the project may be. Remember, projects make up 60% of your grade, and ANY NHIs hurt your grade badly in this class.
I have not yet graded Hockney (paper collage) or the Backlit Landscape (12/6/1), but you know whether or not you've turned those in. They will also be included on this report card.
Still Life Photography
Check out the following sites:
http://webhome.idirect.com/~dpl/gallery1.html
http://www.betterphoto.com/gallery/dynoGall2.asp?cat=17
http://www.usefilm.com/photo_category/16/Pictures_of_Still_Life.html
http://www.apogeephoto.com/mag2-6/mag2-7winners.shtml
http://www.stilllifewith.com/2006/07/14/photo-contest-from-food-wine-magazine/
http://stilllifewith.com/2006/12/01/stw-challenge-for-december-tradition/
http://digitalmedia.oreilly.com/2004/09/15/food_photos.htmlhttp://www.markhemmings.com/MarkWebsite/food_photography/index.htm
http://dessertfirst.typepad.com/dessert_first/2006/05/food_photograph.html
Basic Principles of Still Life Photography:
Throughout the decades, artists have depicted still life scenes—arrangements of inanimate objects—in paintings and photography. Shooting still life subjects is one of the best ways to sharpen your photographic skills. You can take your time, and your subject remains stationary.
Good composition, framing and lighting are all very important to translate your still life into a great photo. Every day we are bombarded with still life images of appetizing foods, shiny housewares and other appealing products in magazine ads, brochures and catalogs. Professionals spend a great deal of time setting up these shots and you can learn a lot just by studying the photos you find most appealing and unique.
Notice how photographers use repeating shapes and lines to create patterns and use complimentary colors. Study the lighting that they use. Simplicity is very important when composing still lifes. You don’t need to collect a wide range of complicated objects to create an interesting picture. Instead, choose a few objects with a common thread.
The arrangement of a still life should begin with the positioning of a single dominant subject. Then add other objects one at a time, and examine the arrangement through your camera’s viewfinder. Experiment with your camera angle until the scene shows the elements in the most pleasing balance. Photograph the original grouping, and then rearrange or remove objects to see if it improves the composition.
Your next project will involve setting up a still life of specific objects and photographing it. To help prepare you, read the previously mentioned articles and find 6 still life photographs from the Internet that you particularly like. These photos should include only inanimate objects. Paste the 6 photos to a one-page word document (two columns) and write a short paragraph about each. Tell what techniques the photographer used that appeal to you. This will be due at the end of class Friday, January 11th. Turn in a hard copy, and leave a copy in the shared folder.
Over the weekend, take still life photographs of any subject---your choice! We are going for BEAUTY! Experiment with the arrangement and lighting. You should use a minimum of five inanimate objects. Take some photos with flash and some without. Be creative! Think about the elements of composition we have just studied. Be prepared to work with your photos Monday, January 14th. A contact sheet of 12 will be due at this time. If you do not have your photos Monday, you will be writing a paper on still life photography while the rest of us work in PhotoShop. The 6 edited and best 5x7 are due at the end of class Tuesday, January 15th. The alternative assignment, a 3-page paper on Photographic Still Life, is due then as well. We will move on to the next topic the following week. Unless you are absent Tuesday, you are expected to have this project completed then.
Thursday, January 3, 2008
Next Picture-Taking Assignment
Remember the Backlit Photos we took LAST YEAR??? Now you will take a backlit landscape. Go for beauty! Any sunrise or sunset would qualify. Watch your lens flares! Contact sheet of 12 is due Monday, January 7th.
Welcome Back!!
It was tough to get out on this COLD morning, wasn't it??? Today is your last opportunity to submit a photo for consideration for the upcoming art show. We will vote tomorrow to decide which ones get printed, matted, and will go to the show!
Your contact sheet/12 Hockney photos is due today. Also, please print a black and white contact sheet of 24. Cut these photos out and arrange into a practice collage on plain white paper. You must have my approval on this prior to beginning your final project on 18"x24" newsprint paper. Your practice collage will be graded, and is due by the end of class today. Final will be due next week. Before beginning final project, open each photo, adjust levels, brightness/contrast, and crop if necessary. Each small photo should look good on its own!
If you need to refresh your memory about Hockney, do so following the links in the previous posts.
Subscribe to:
Comments (Atom)






.jpg)

